
Odoo 19 continues to strengthen its reputation as a comprehensive business management system with the powerful reporting capabilities of its Accounting module. These reports play a critical role in monitoring financial performance, ensuring regulatory compliance, and supporting informed decision-making across organizations.
From essential financial statements such as Balance Sheets and Profit & Loss reports to more advanced analytical reports and tax summaries, Odoo 19 delivers real-time, accurate, and flexible financial insights for businesses of all sizes.
What’s New in Odoo 19 Reporting
The latest version introduces several improvements that enhance usability and performance, including:
- A more intuitive and user-friendly interface
- Faster report generation and processing
- Enhanced integration with other modules such as Inventory, Sales, and Purchases
These enhancements allow businesses to streamline financial operations while gaining deeper visibility into transactional data with improved accuracy and efficiency.
Understanding Accounting Reports
Odoo 19 offers a wide range of accounting reports that can be tailored to meet specific business requirements. These reports not only provide a clear view of financial data but also allow users to analyze performance and make strategic decisions.
With the new customization features, users can make reports more insightful, structured, and aligned with their business needs. By choosing the appropriate choice from the provided list, you can even modify the settings of reports that are already in place, as shown below.
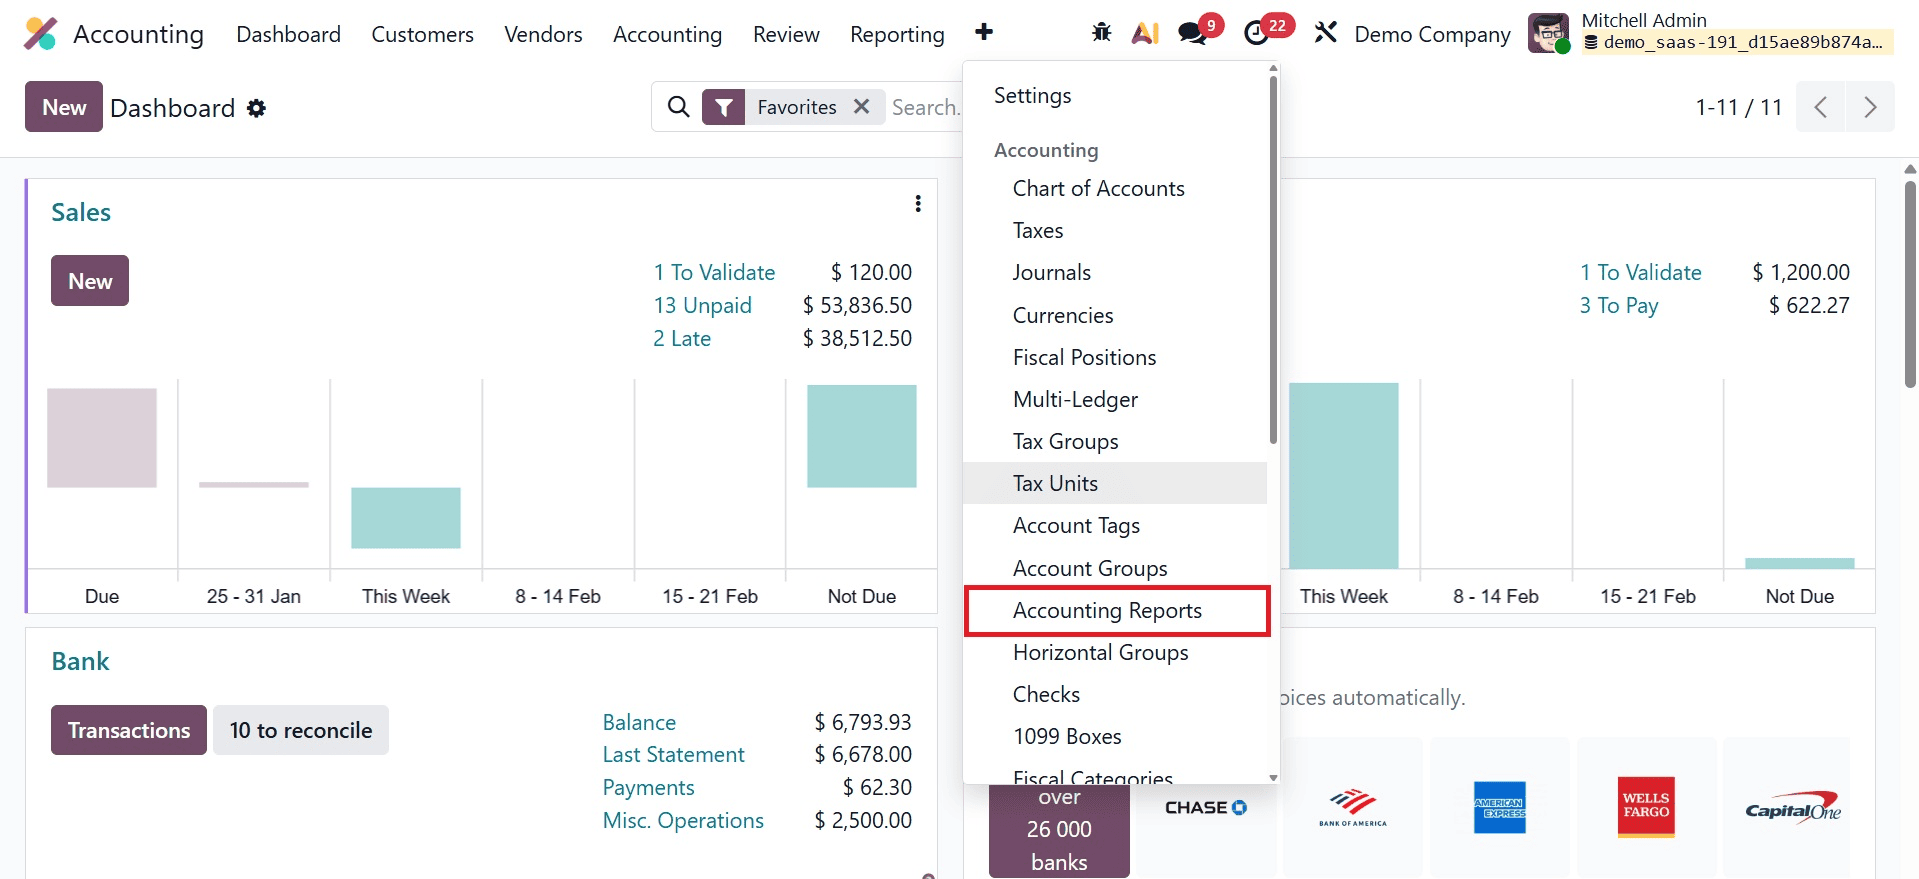
Let's use an example to illustrate this functionality. In this part, we will customize the aged receivables report. You can choose the Aged Receivable for this purpose from the list.
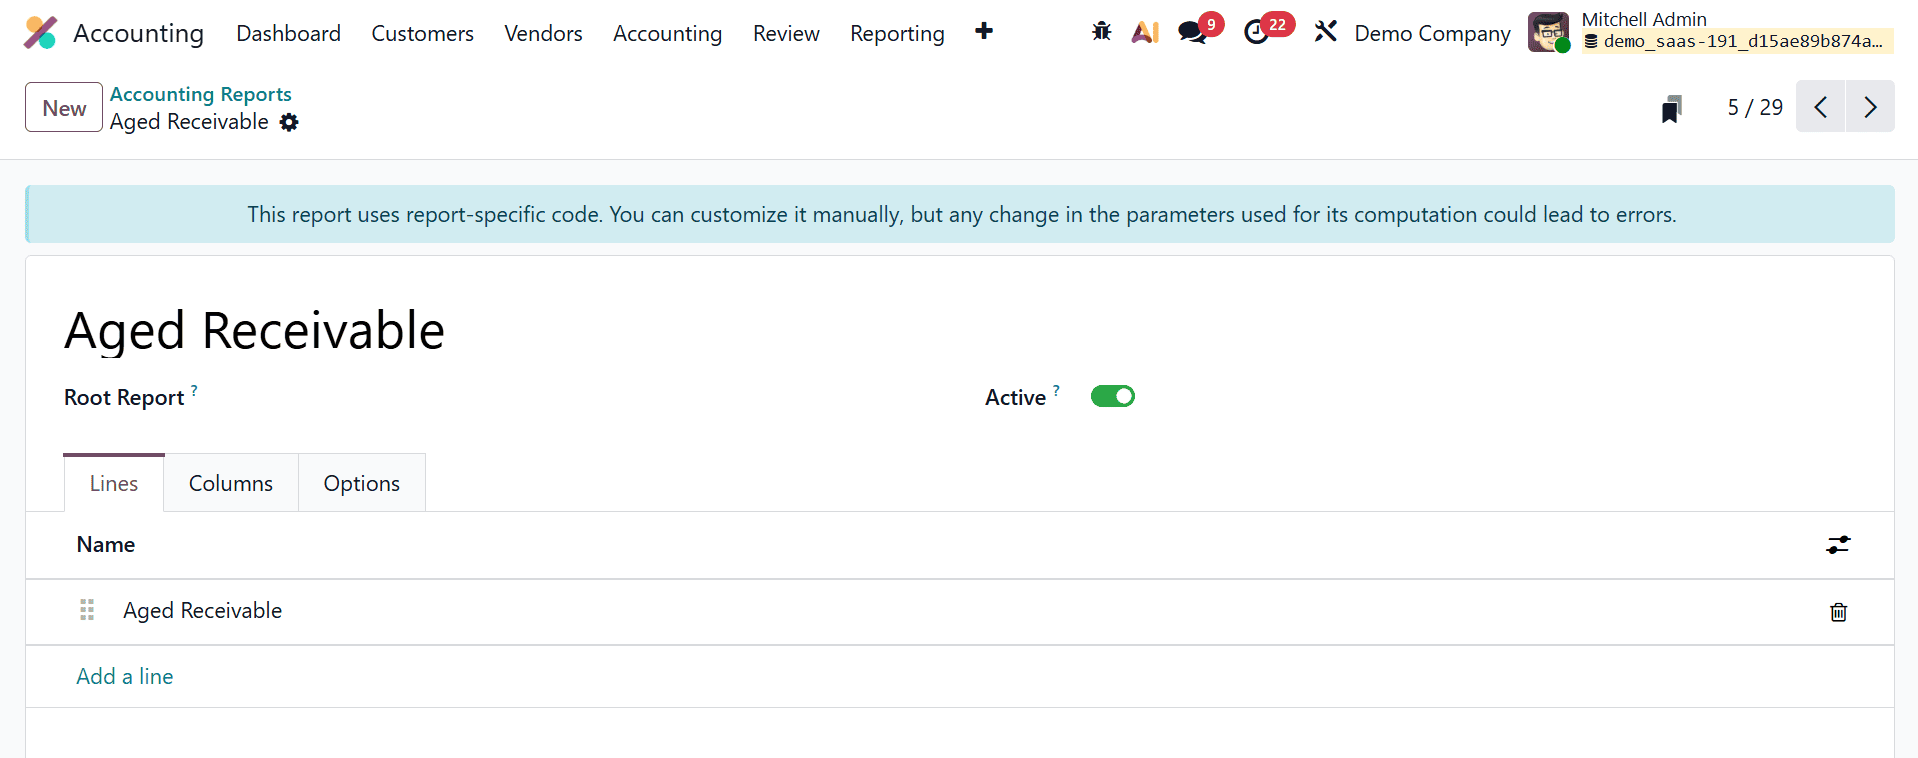
This section displays the title of the report. The report selected in the Root Report field acts as the base, with the current report functioning as a variation of it. Under the Lines tab, you can use the Add a Line button to create new report lines. When clicked, a pop-up window will appear, allowing you to configure the details of the new report line.
We have added a new report line called Aged Receivable to our financial report. You can set the Partner ID for this line in the Partner field. If you enter keys in the Group By field, a different list of options will appear for that line.
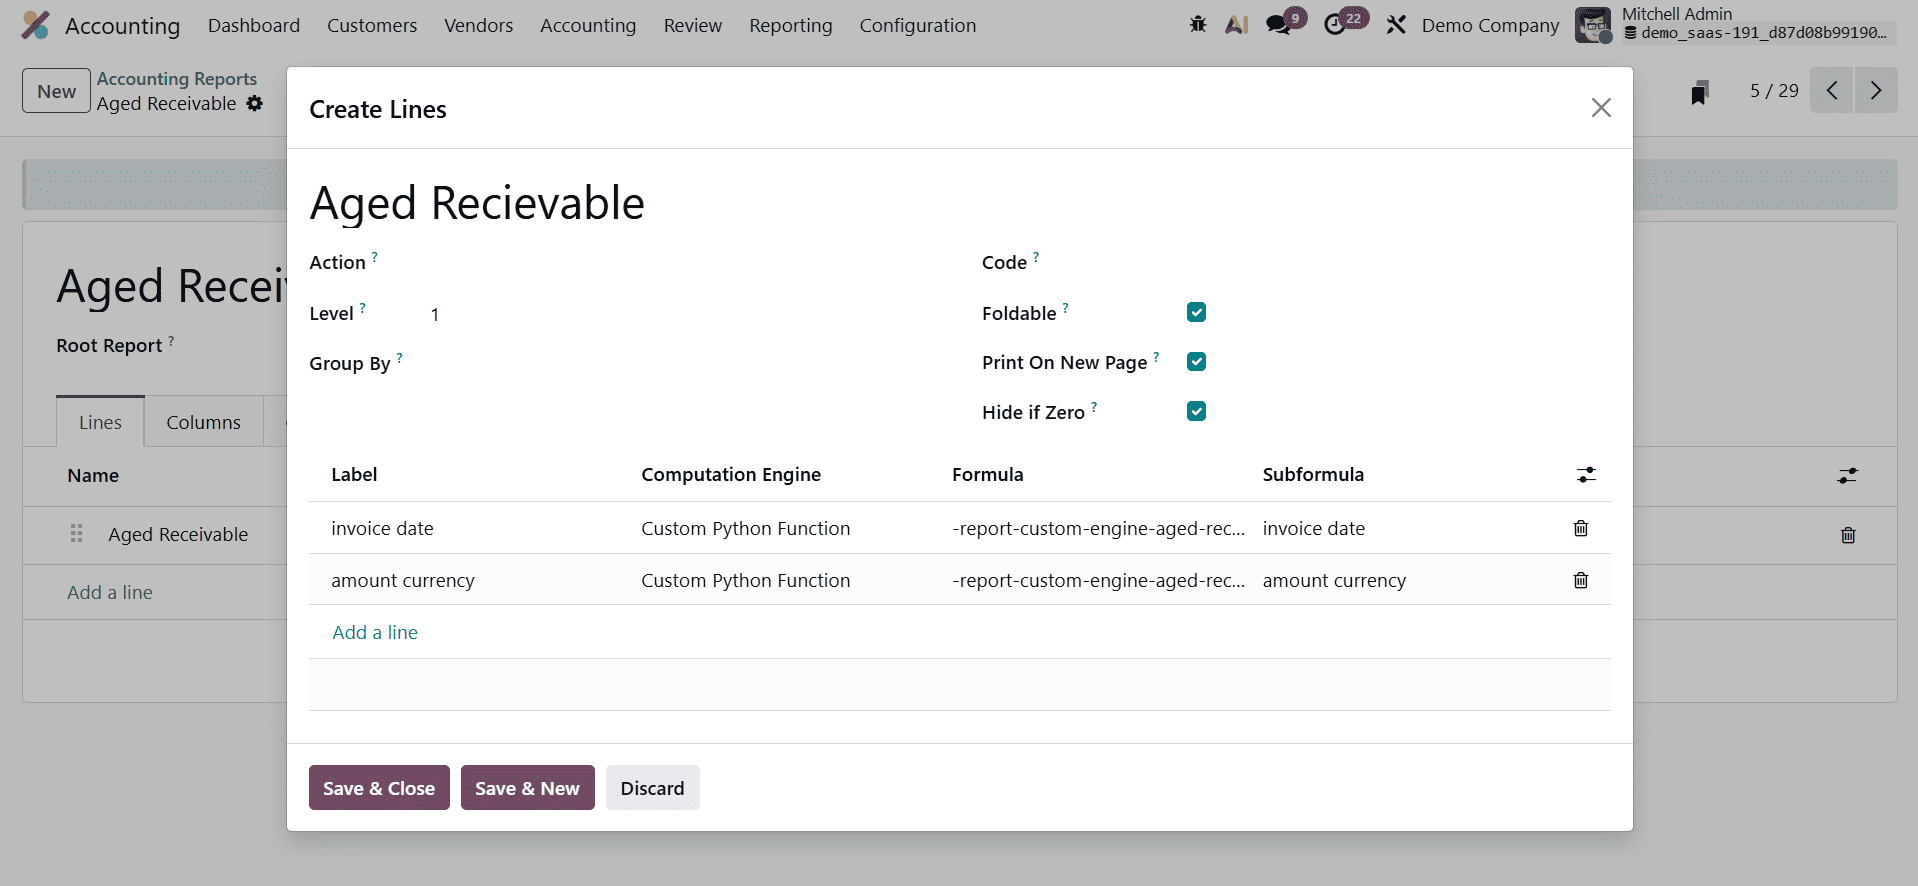
Use the Action box to turn the report line into a link, and use the Level field to set its position in the report's hierarchy. In the Code section, you can give the line a unique ID. If you check the Foldable box, a button will appear that allows you to collapse or expand the line. To start a new page when printing, simply click the New Page button.
If the Zero function is enabled, the line will be hidden automatically if all Odoo columns show zero. You can define the Label, Formula, Subformula, and Computation Engine by clicking the Add a Line button. You can see the newly created line in the Aged Receivable report as shown below.
You can now update the report with a new column. To add more columns to the Aged Receivable report, simply go to the Column page and click the Add a Line option.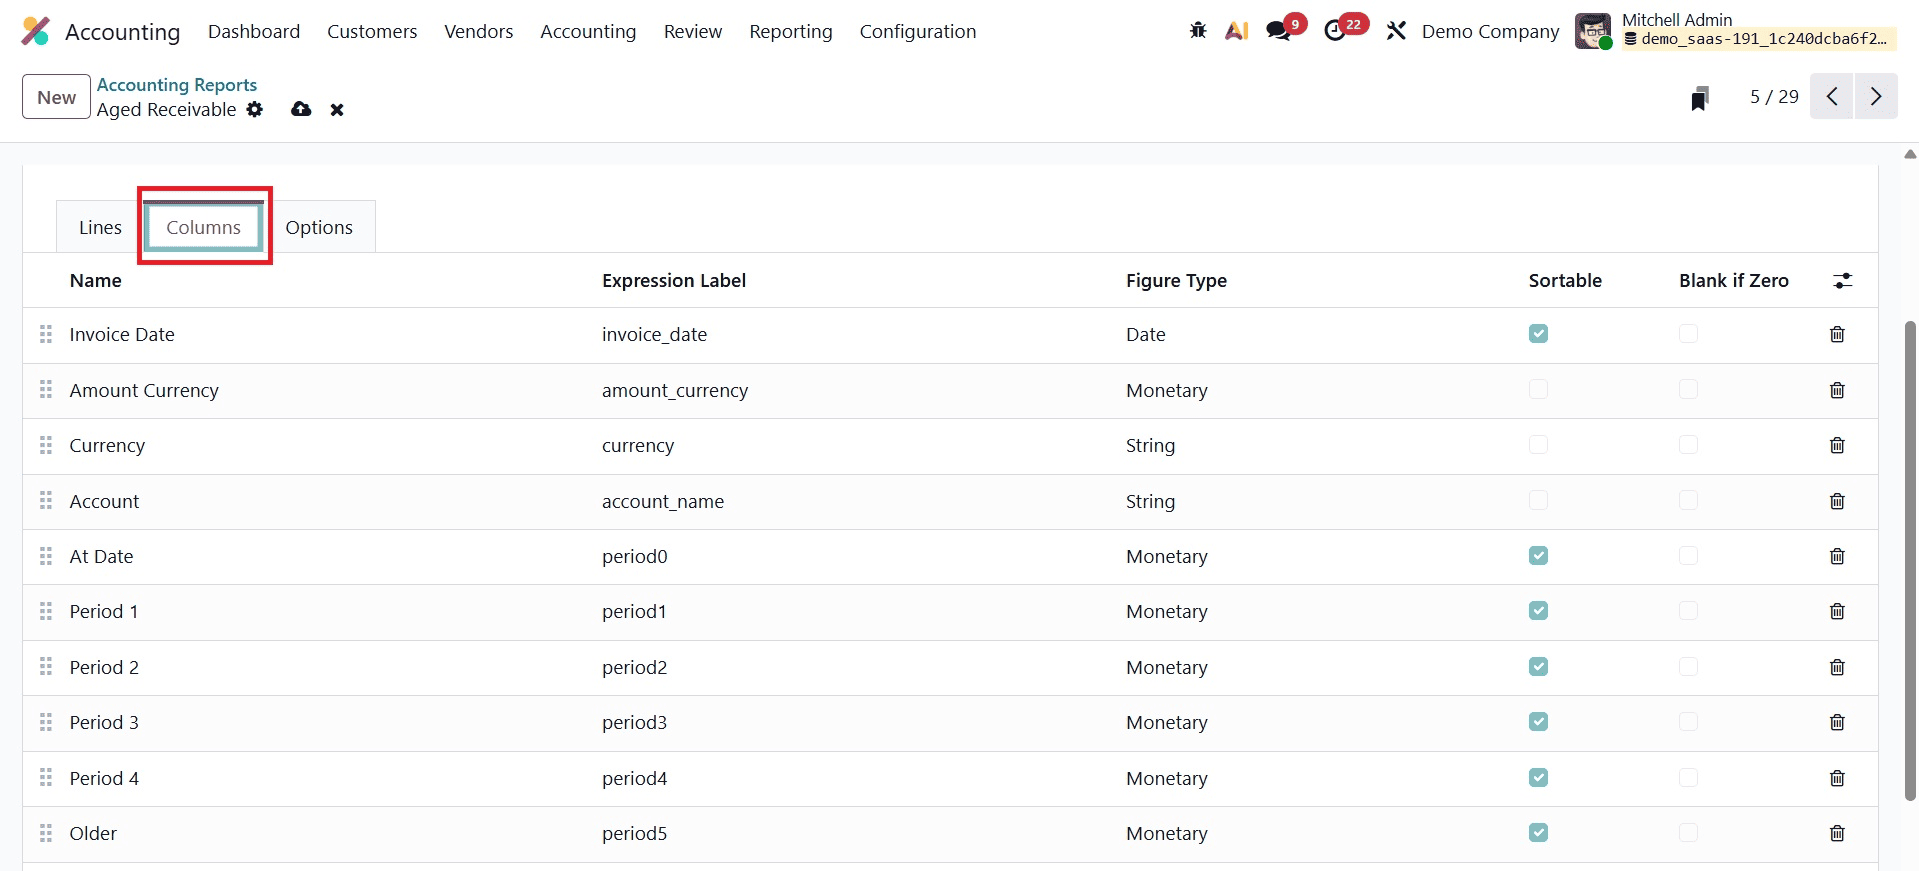
We are now including a Currency column in our report. In the relevant fields, you can enter the Name, Express Label, and Figure Type. If needed, you can also enable the Sortable and Blank if Zero options.
For further modifications, you can use the wide range of customization settings available in the Options tab.
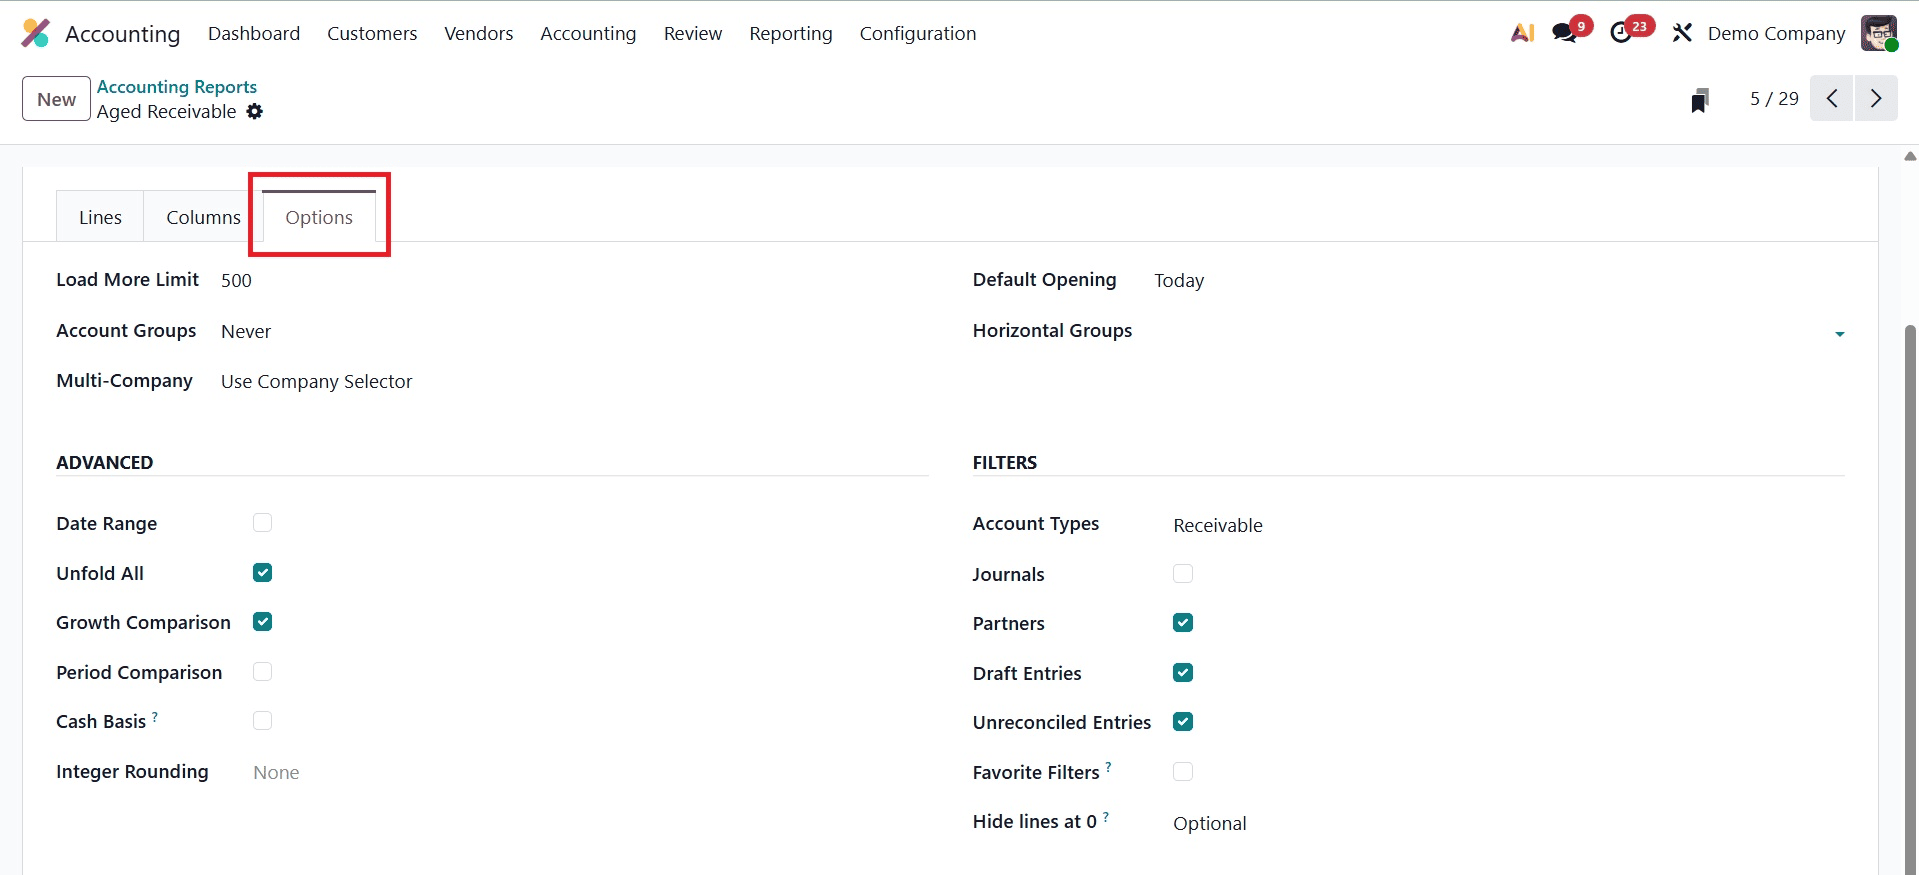
You can use the Load More Limit box to change the limit value. The Account Groups feature offers three options: Enabled by Default, Always, and Optional.
To manage the Multi-Company filter, you can use the Use Company Selector or Use Tax Unit settings. If you want to turn the filter off entirely, set the field to Disabled. Additionally, you can set a specific time period in the Default viewing area so that the Aged Receivable report automatically displays that period when you open it in Odoo.
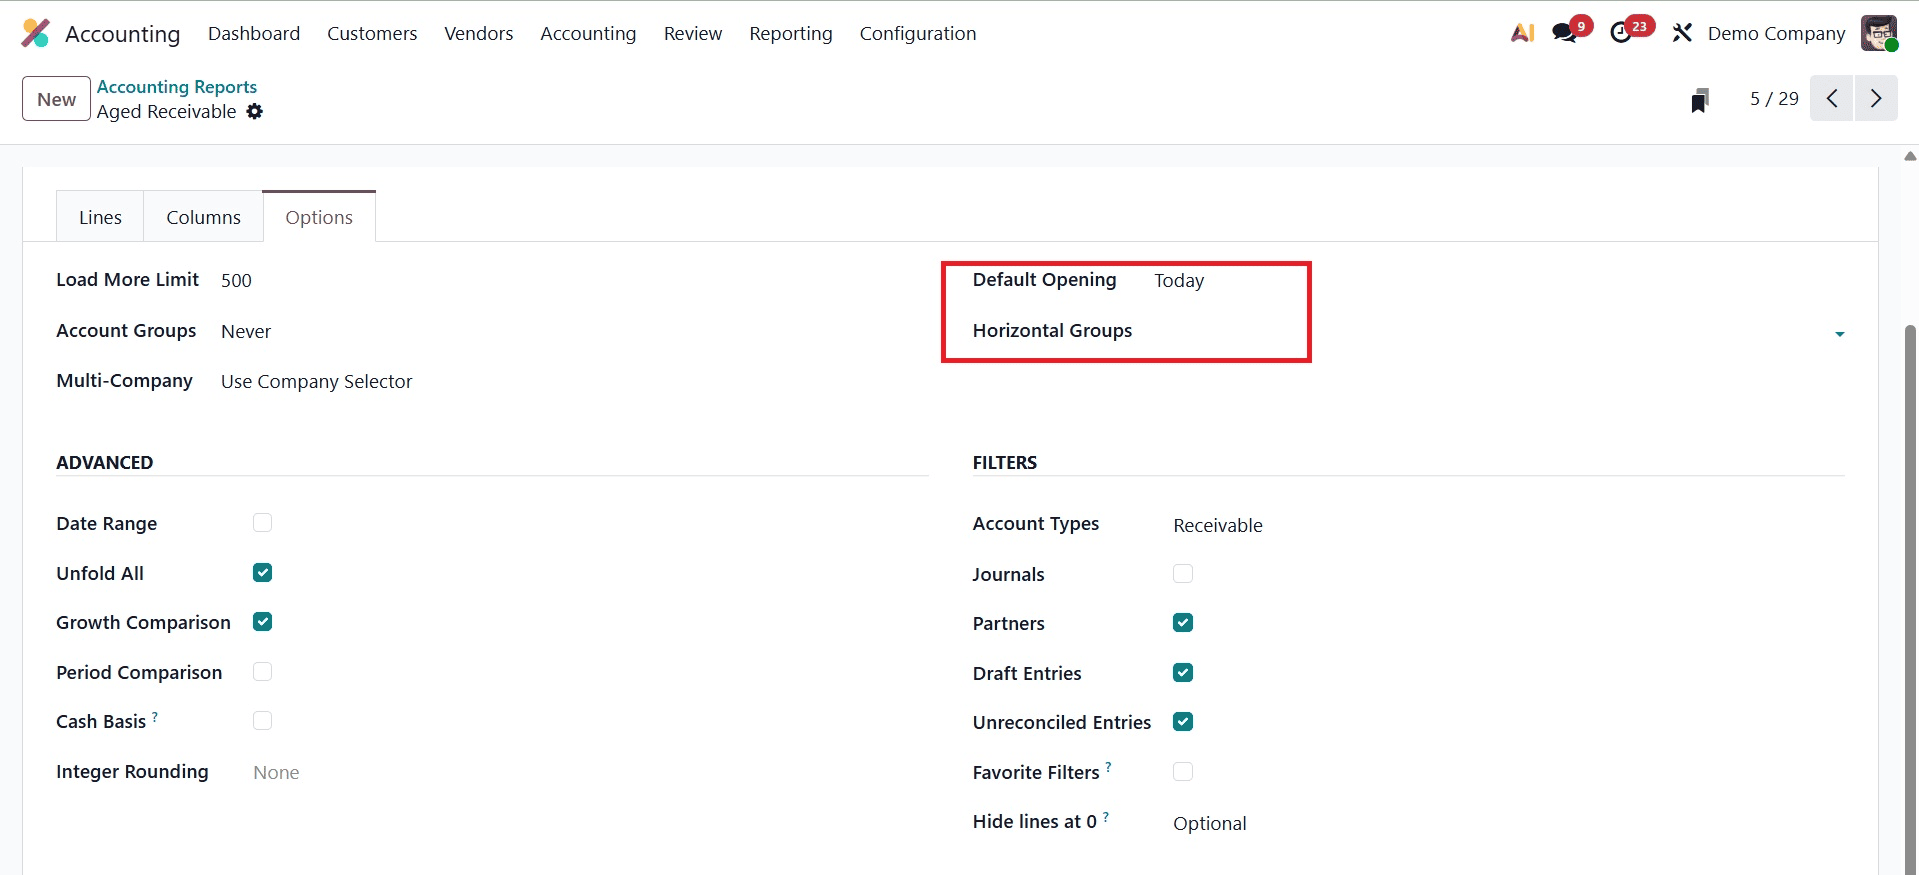
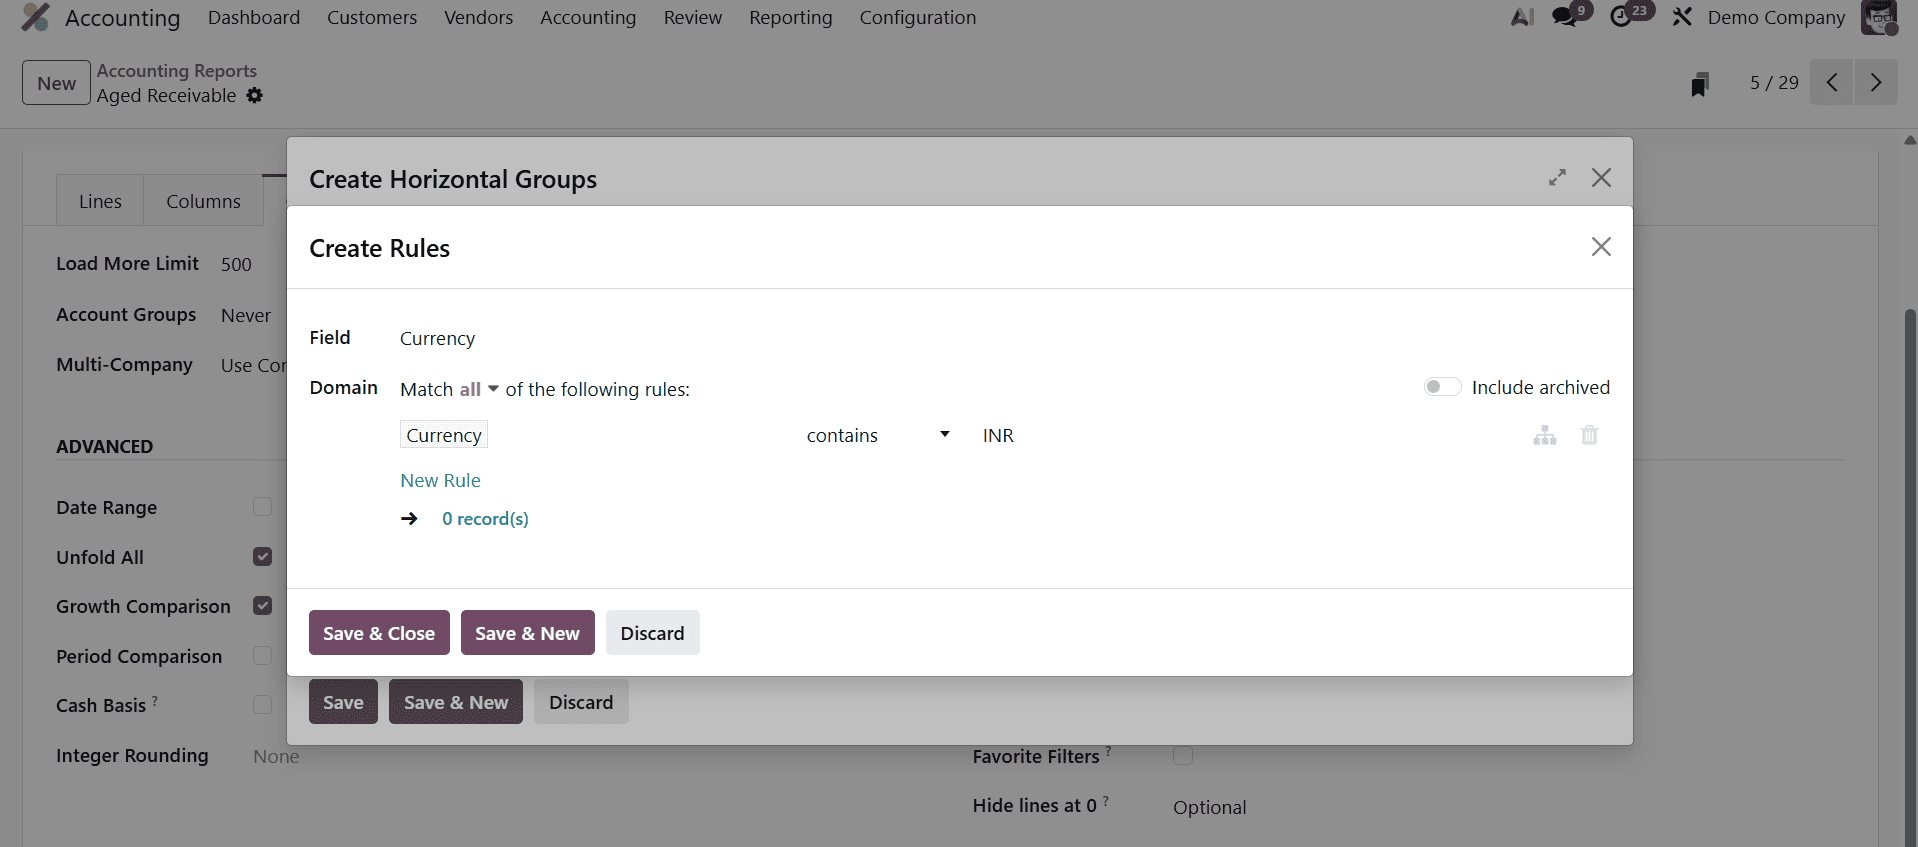
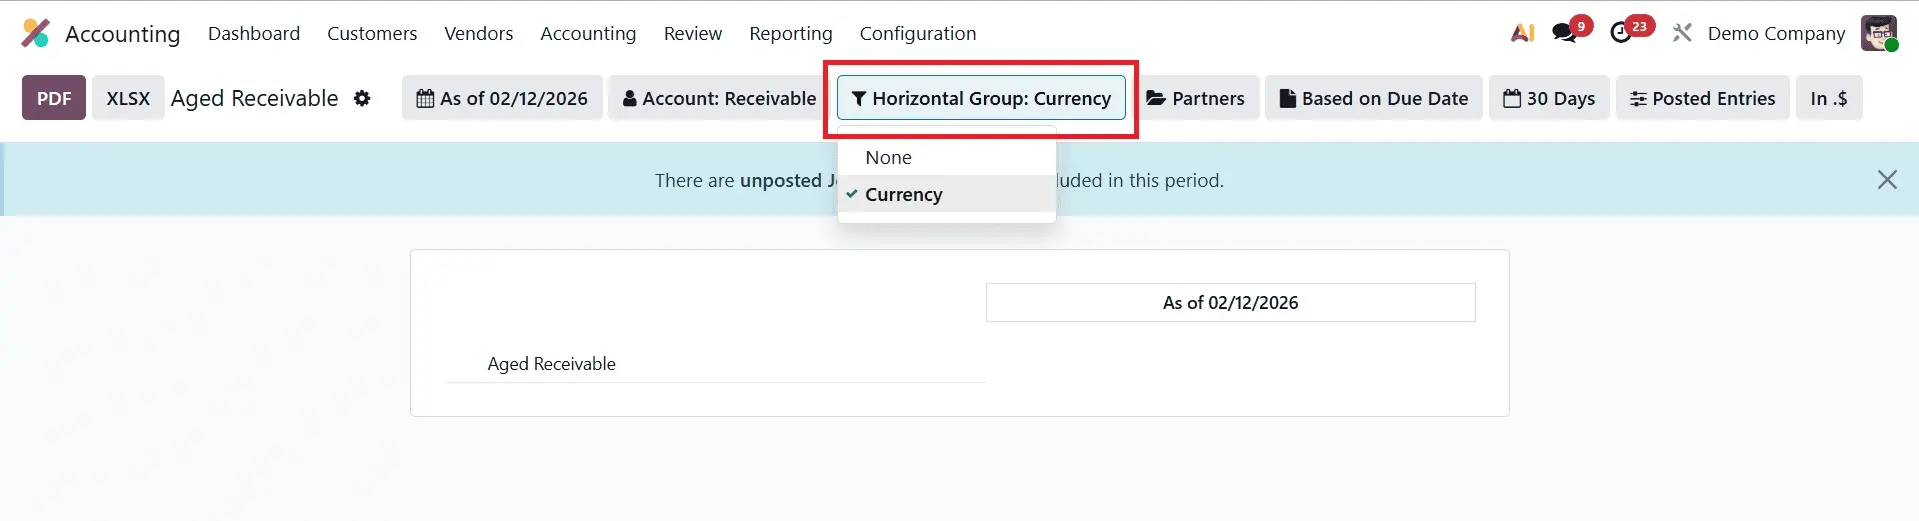
You can expand the available area to include any necessary Horizontal Groups. To do this, simply add a horizontal group, such as Currency, as shown in the illustration below.
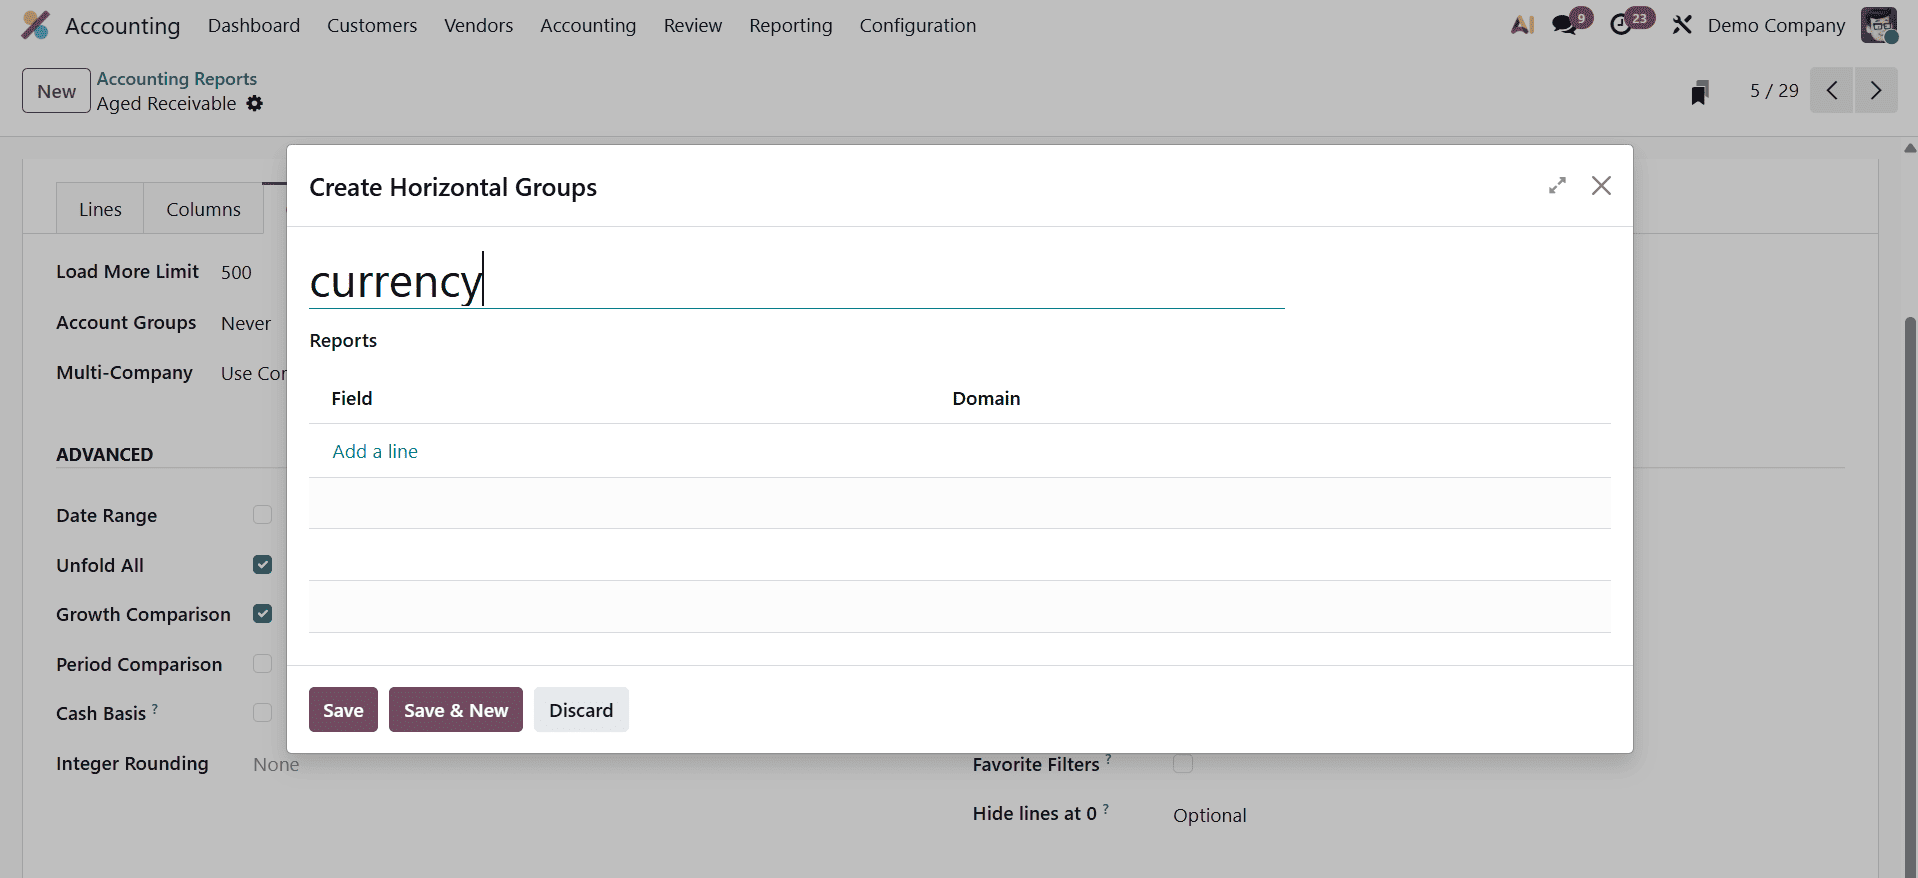
Use the Add a Line option to add the field. In this example, the Currency Contains INR filter has been added.
Once you save the data, you will see that the newly generated Currency column has been added to the Aged Receivable report
To add more sorting options to your reports, you can enable the Analytic Filter and Analytic Group By options.
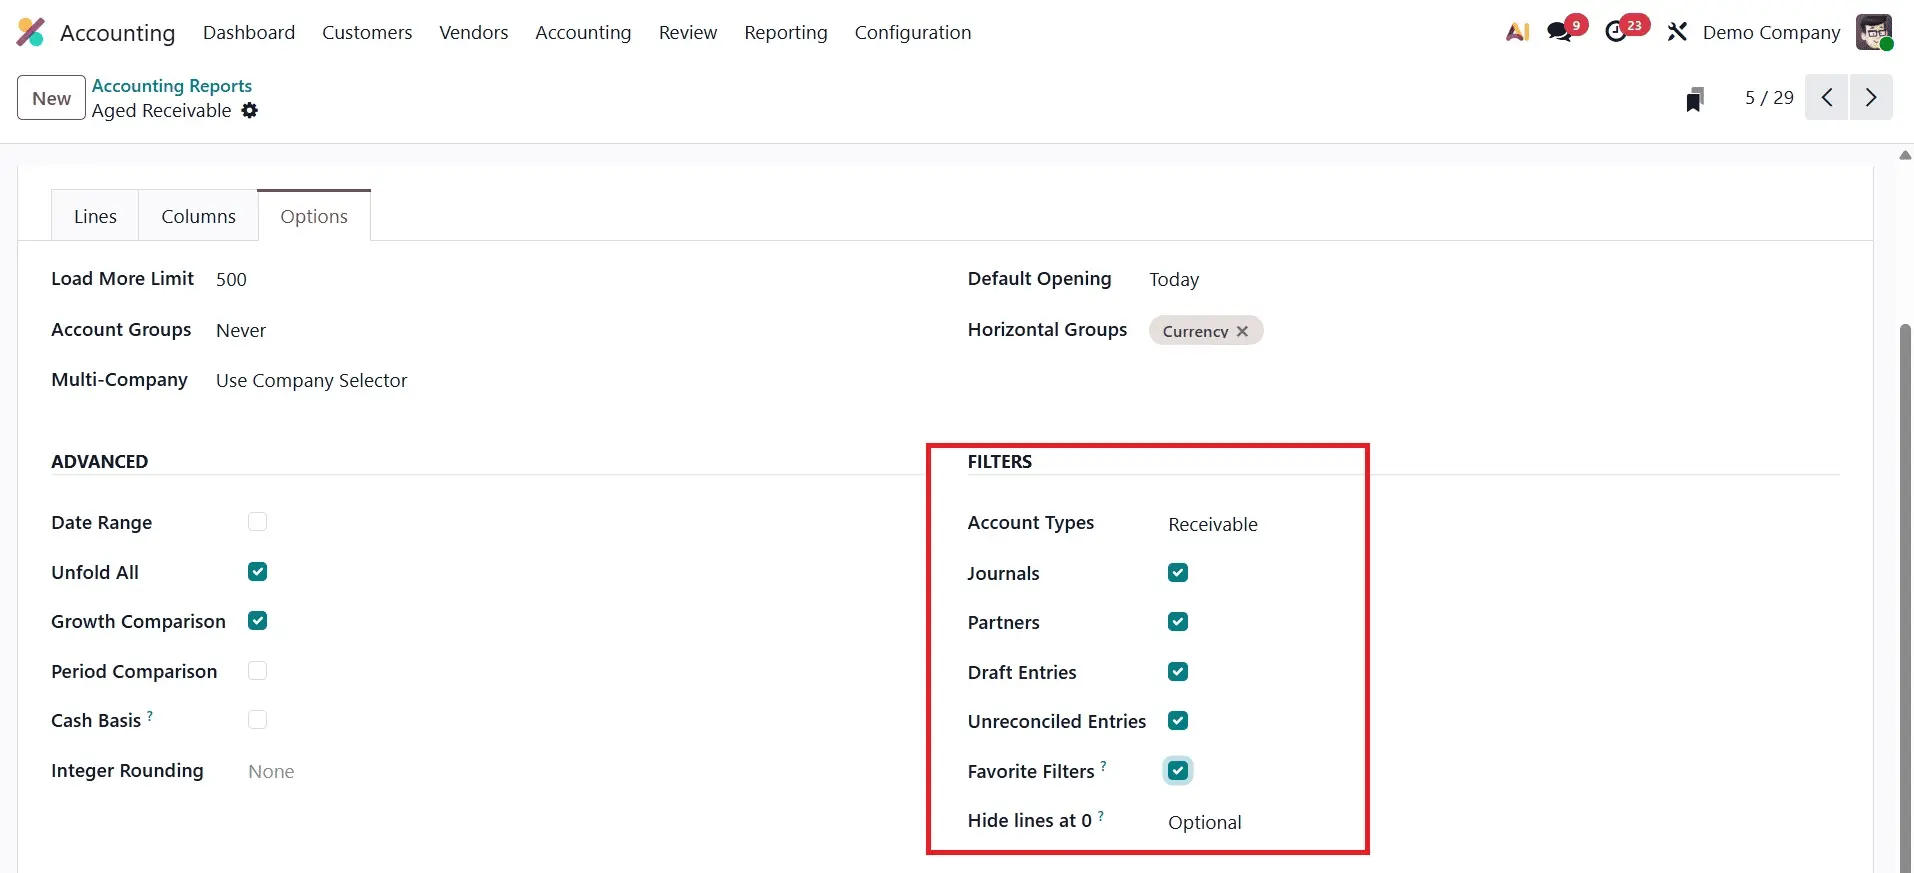
On the Aged Receivable report, you can activate the relevant fields in the Advanced section to enable the Date Range, Unfold All, Growth Comparison, and Period Comparison features. The option to switch to Cash Basis mode will become visible once the Cash Basis field is selected.
To add even more filters to your report, you can go to the Filters section and activate Account Types, Journals, Partners, Draft Entries, and Unreconciled Entries.
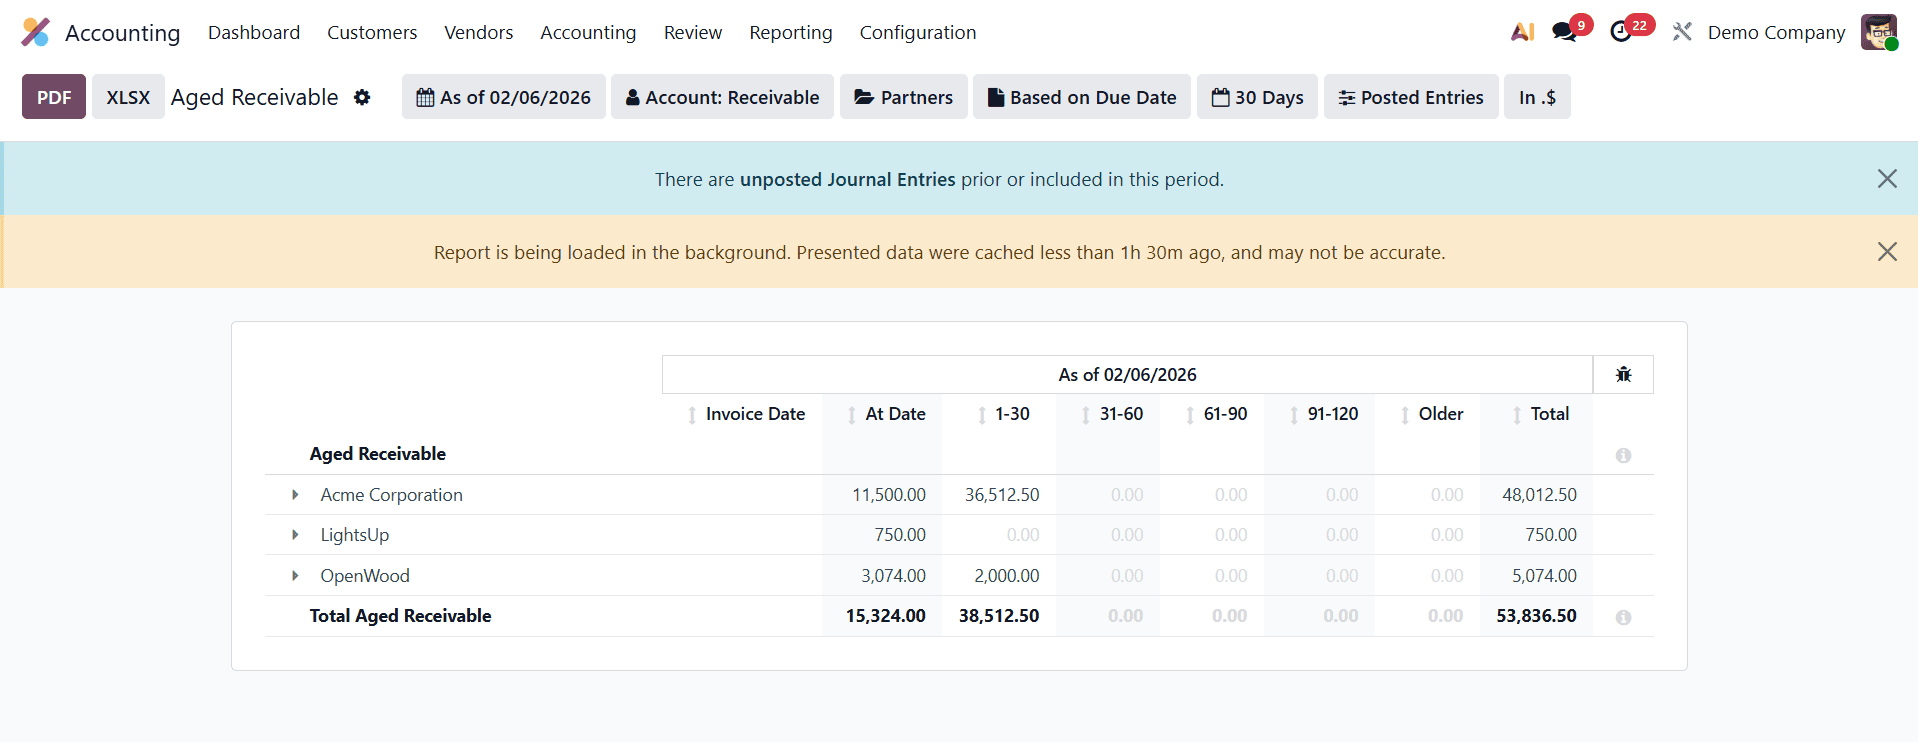
After you make the necessary adjustments to the Aged Receivable report settings, you will see these changes reflected on the reporting platform, as shown in the image below.
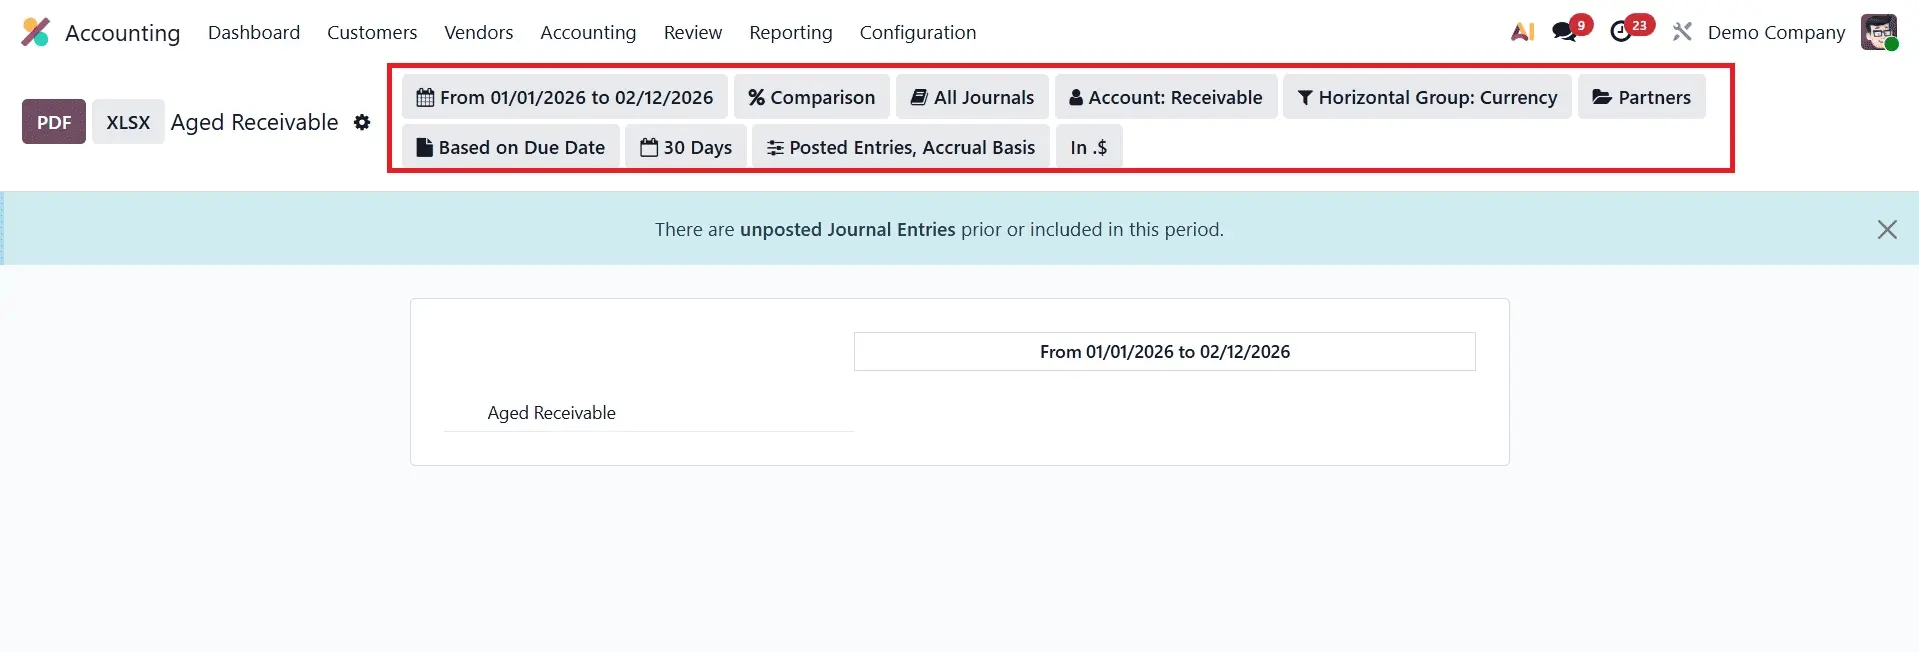
With the Accounting Reports tool, you can perform a comprehensive analysis of your company's financial activities and modify your reports to make them more useful for your business needs.
Contact Us
We'd love to hear from you! If you have any questions, feedback, or need assistance, please feel free to reach out to us using the contact details provided. Our team is here to help and will respond as soon as possible. Thank you for getting in touch!

Phone