
Collaboration and confidentiality must be carefully balanced to ensure effective project management. In Odoo 19, project visibility settings play a crucial role in controlling access to project-related information while maintaining data security. Odoo provides flexible visibility options that support different business needs, whether managing internal teams, working with external clients, or handling sensitive projects.
In Odoo 19, there are three main project visibility levels:
Internal Users Invited (Private)
Only employees who are explicitly added as followers of a project or task can access it. This option is ideal for restricted or confidential projects that should be visible to a limited group of users.
Every Internal User
When this option is selected, the project becomes accessible to all internal users within the organization. It is suitable for companies that require transparency and cross-department collaboration.
All Internal Users (Public) and Invited Portal Users
This setting allows access for both internal users and invited portal users, making it ideal for collaboration with clients, vendors, or external partners.
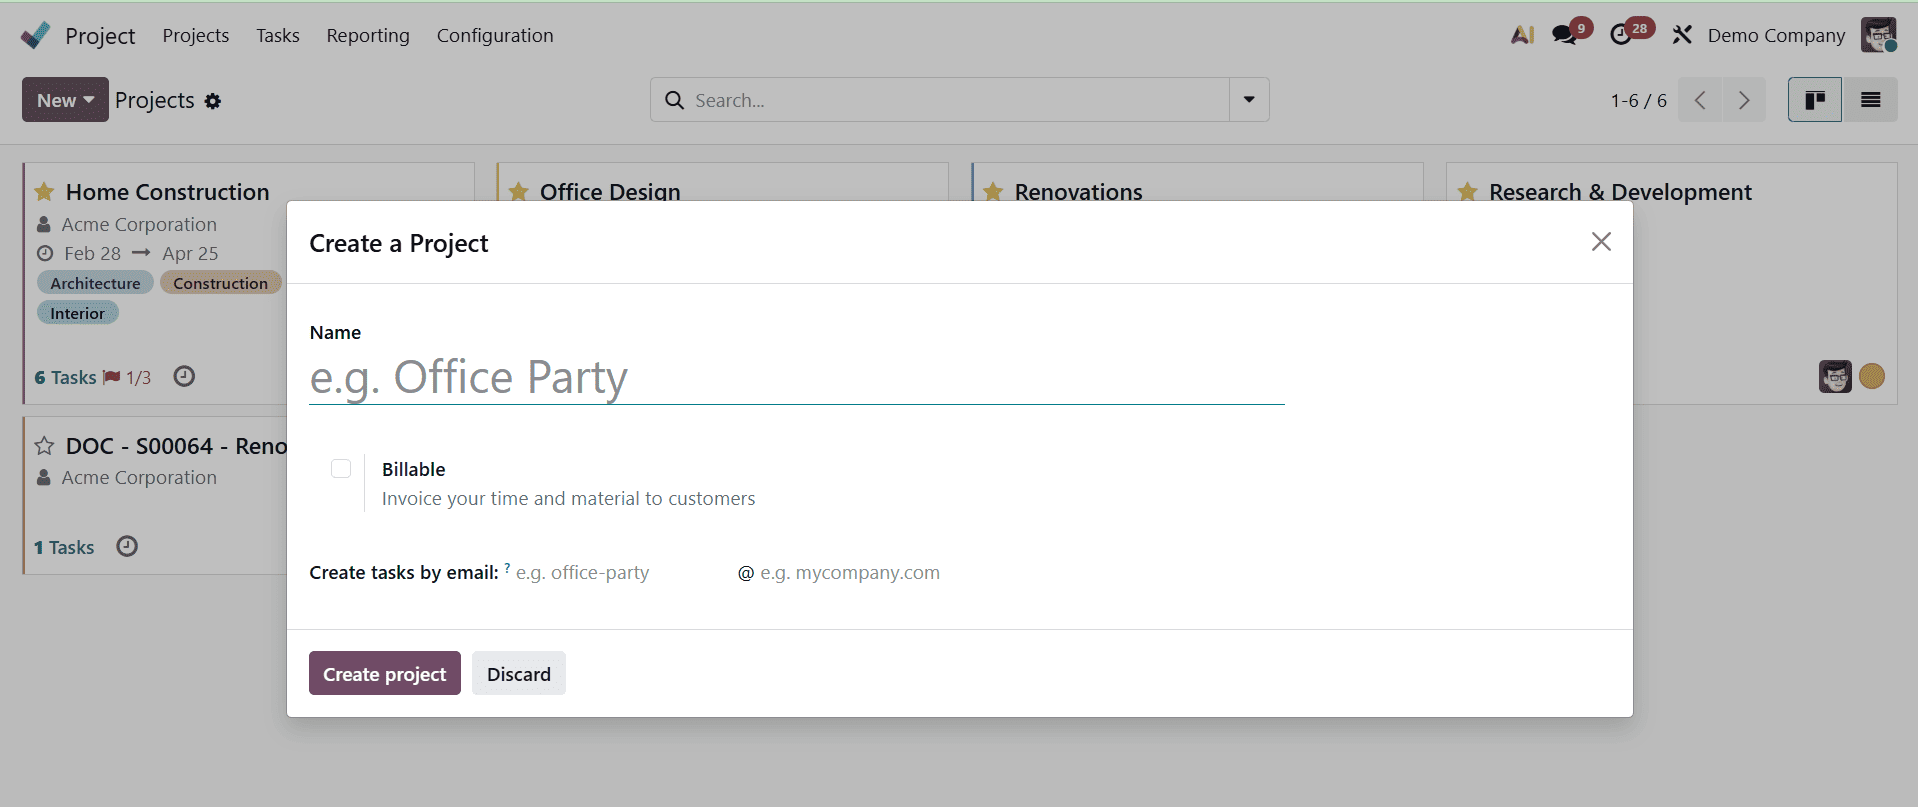
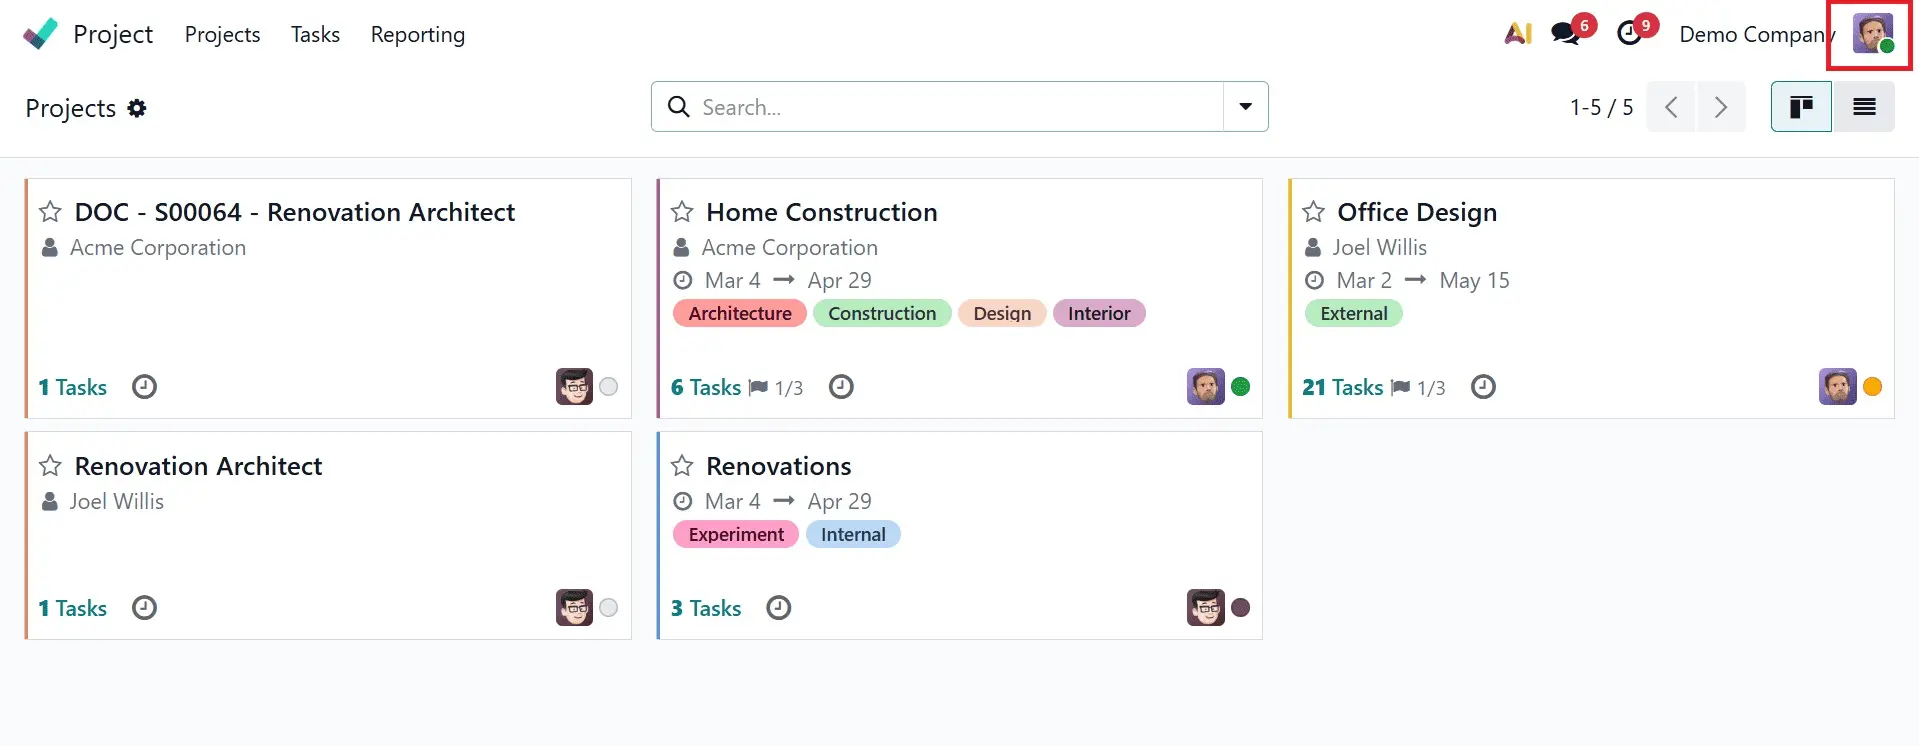
To configure project visibility, navigate to the Project module dashboard. From there, select an existing project to modify its visibility settings, or click New to create a new project. Projects can also be created from predefined templates for faster setup.

Enter all necessary information in the project creation form, including:
- Name: Enter the name of the project.
- Timesheets: Enable this feature to record the time spent on tasks and assignments.
- Billable: Select this option to allow time and material-based billing for the project.
- Customer: Link the project to a specific client for better tracking and reporting.
- Email Alias: Define an email alias to automatically create tasks from incoming emails.
Once all details are filled in, click the Create Project button to complete the setup process.
Click the three vertical dots icon on the project card and select Settings to adjust a project's visibility.

Users will be taken to a comprehensive look of the project after clicking it. Next, select the Settings tab to access the Visibility function.
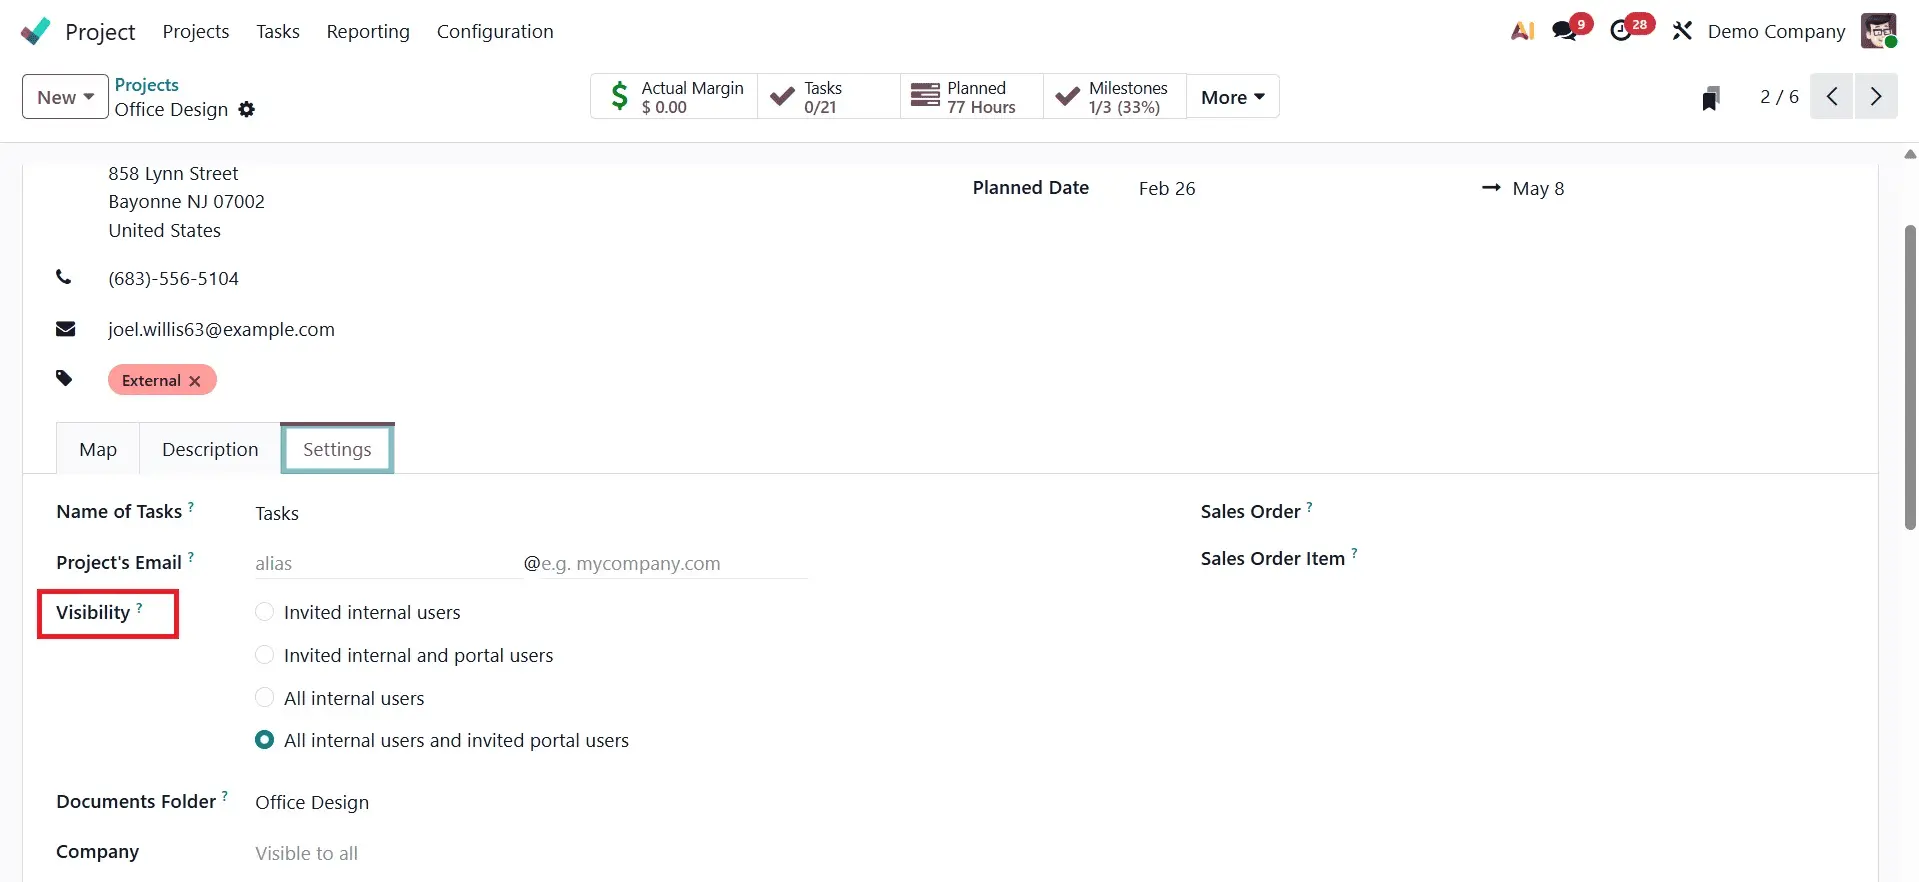
Let’s begin by setting the project visibility to Invited Internal Users. With this configuration, the project is accessible only to employees who have been explicitly added as followers. However, users assigned as assignees to project tasks are automatically granted access to the project.
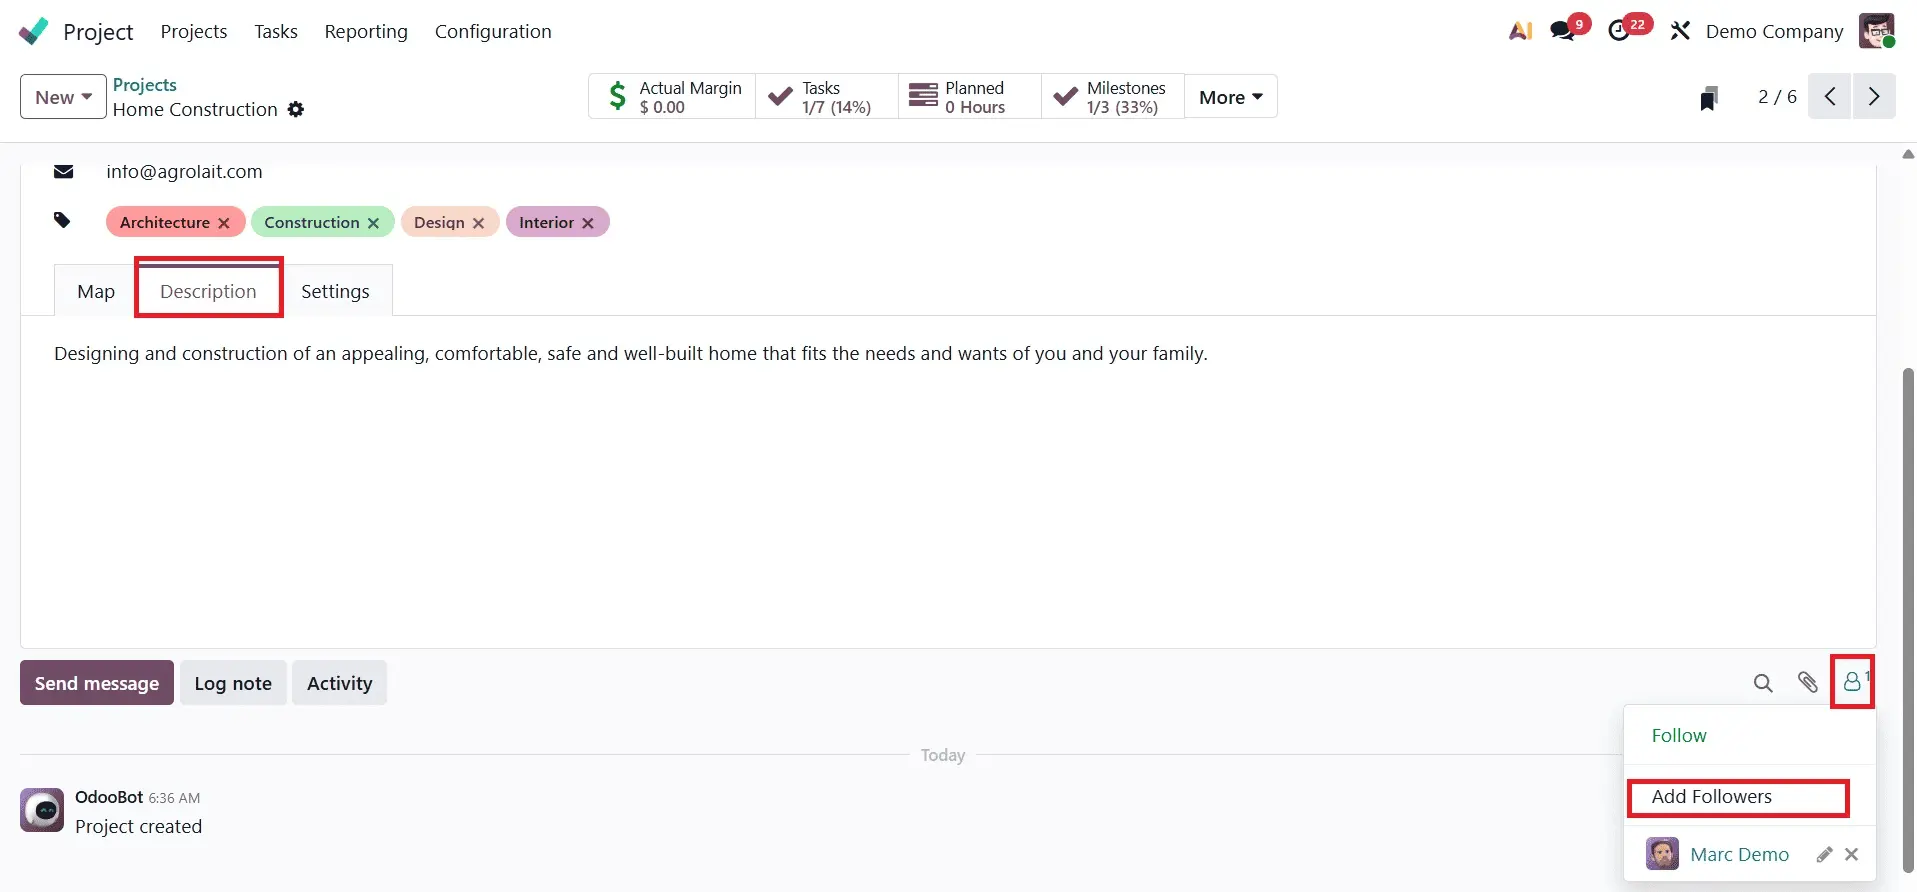
To add a follower, click the icon shown in the screenshot below and select Add Followers, then choose the employee you want to include in the project.
A wizard named Add followers to this page appears after the "add followers" button is clicked.
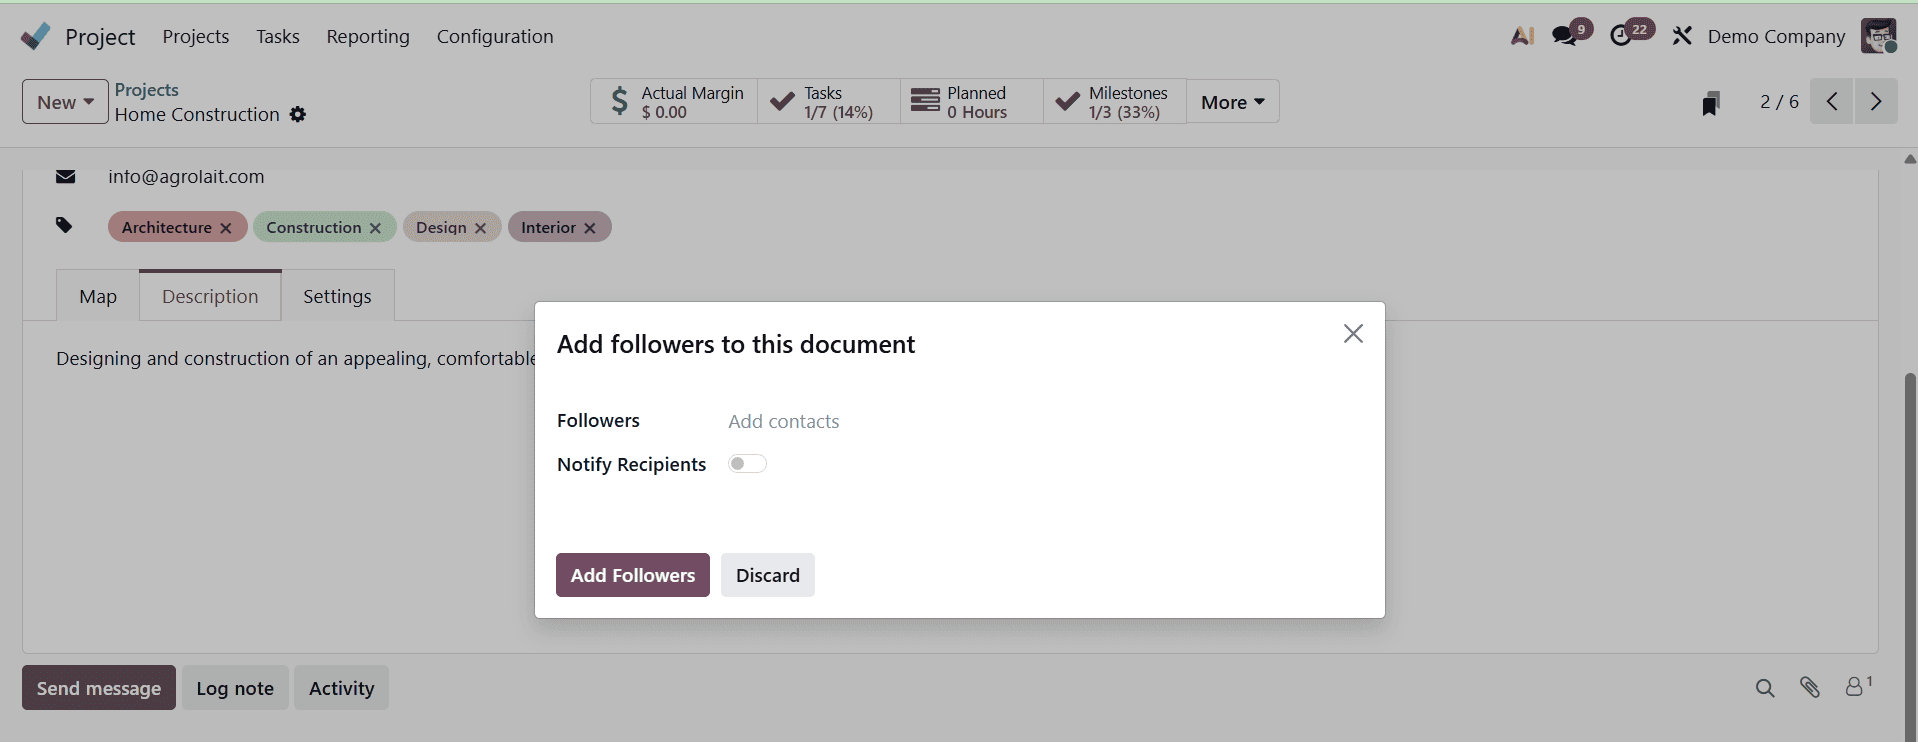
Employees who need to be added as project followers can be included as recipients. You can add multiple recipients if required, and the Notify Recipients toggle allows you to choose whether they should be informed when they are added.
Once the recipients have been selected, click Add and then Close to complete the process.
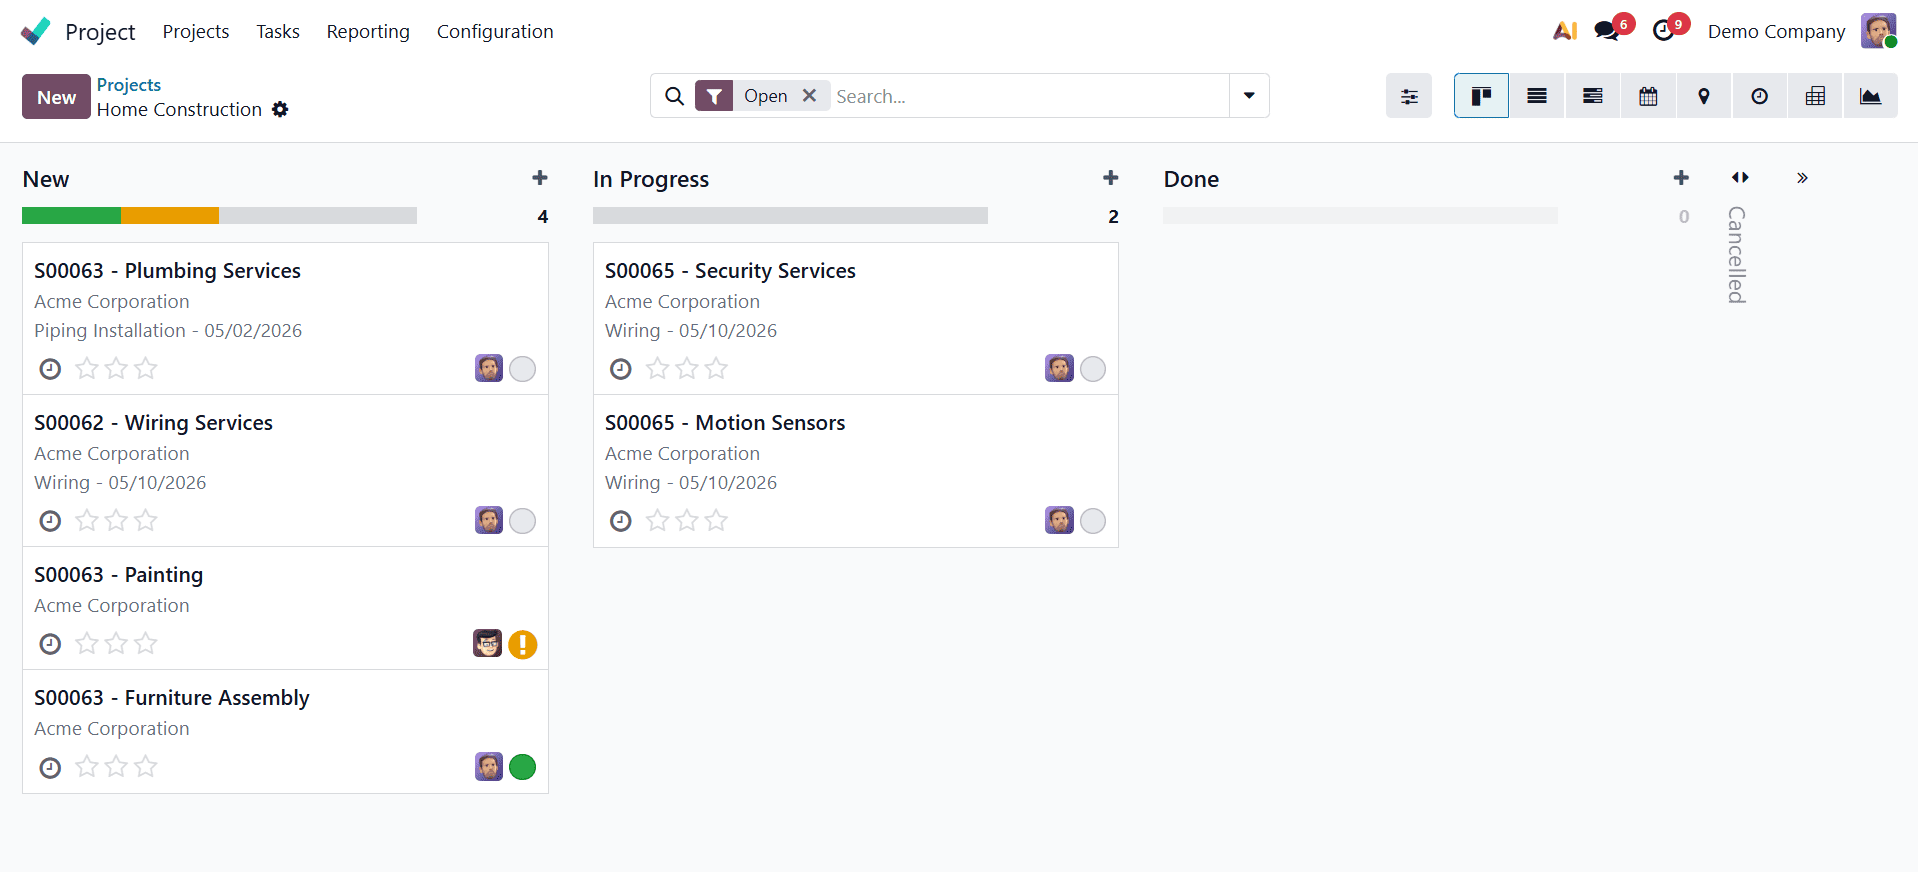
Now, let’s log in as “Marc Demo.”
Here, it is clear that “Marc Demo” has been granted access to the project because he has been added as a follower. As a result, he can view and oversee the project, manage its tasks and responsibilities, and create new tasks under it.
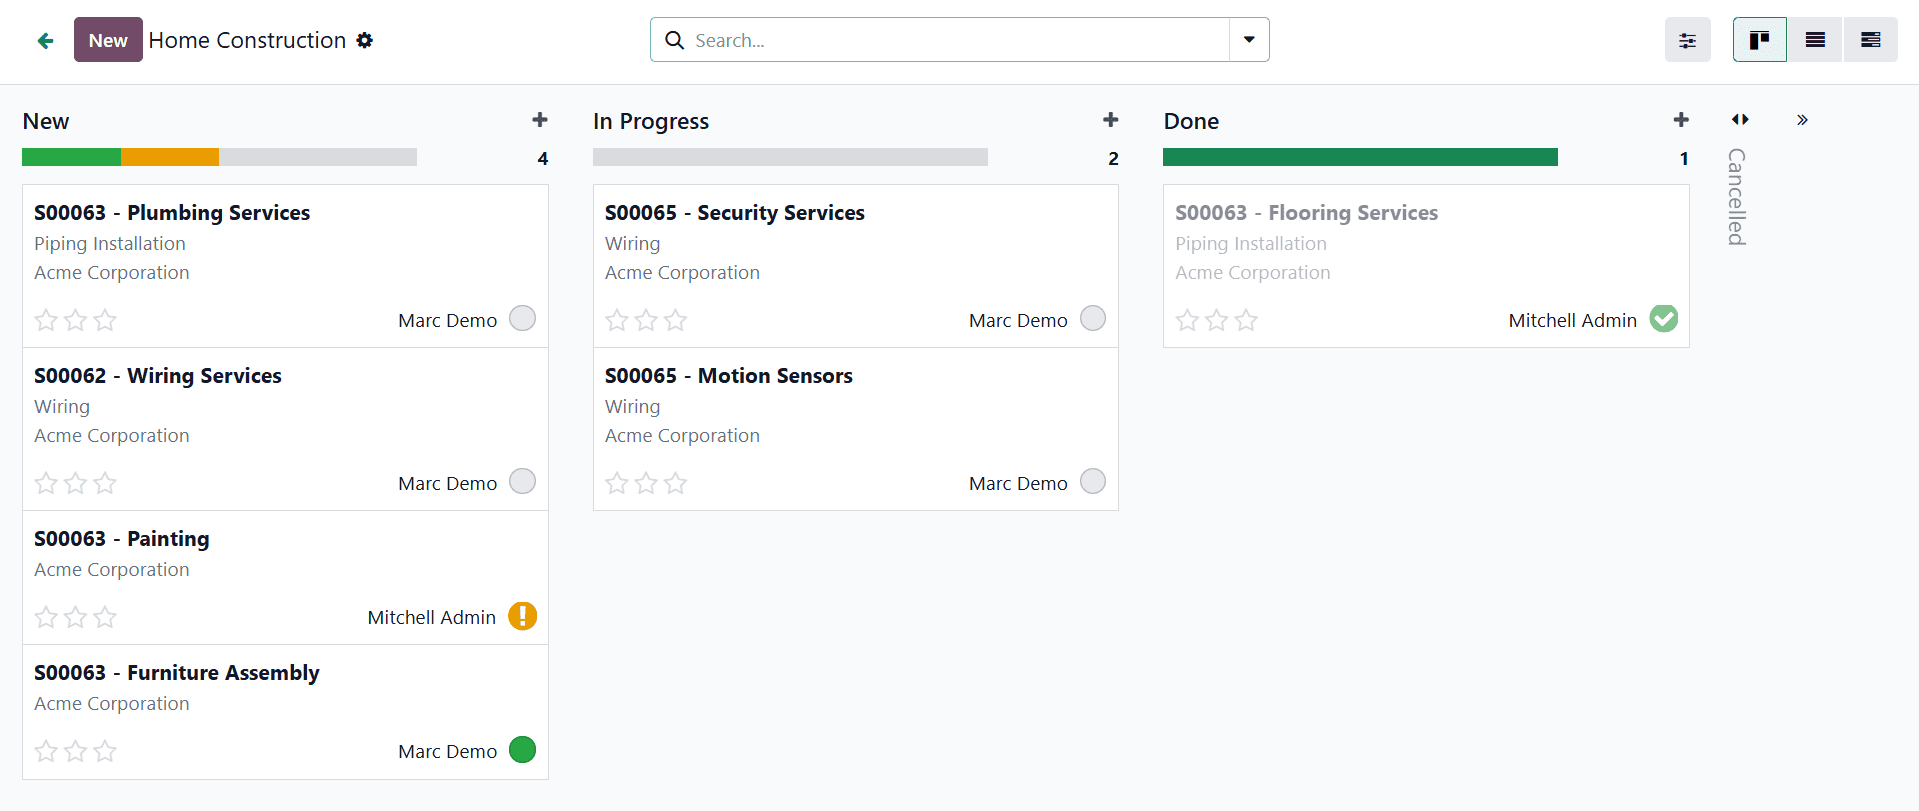
At this stage, change the project visibility setting to All Internal Users.
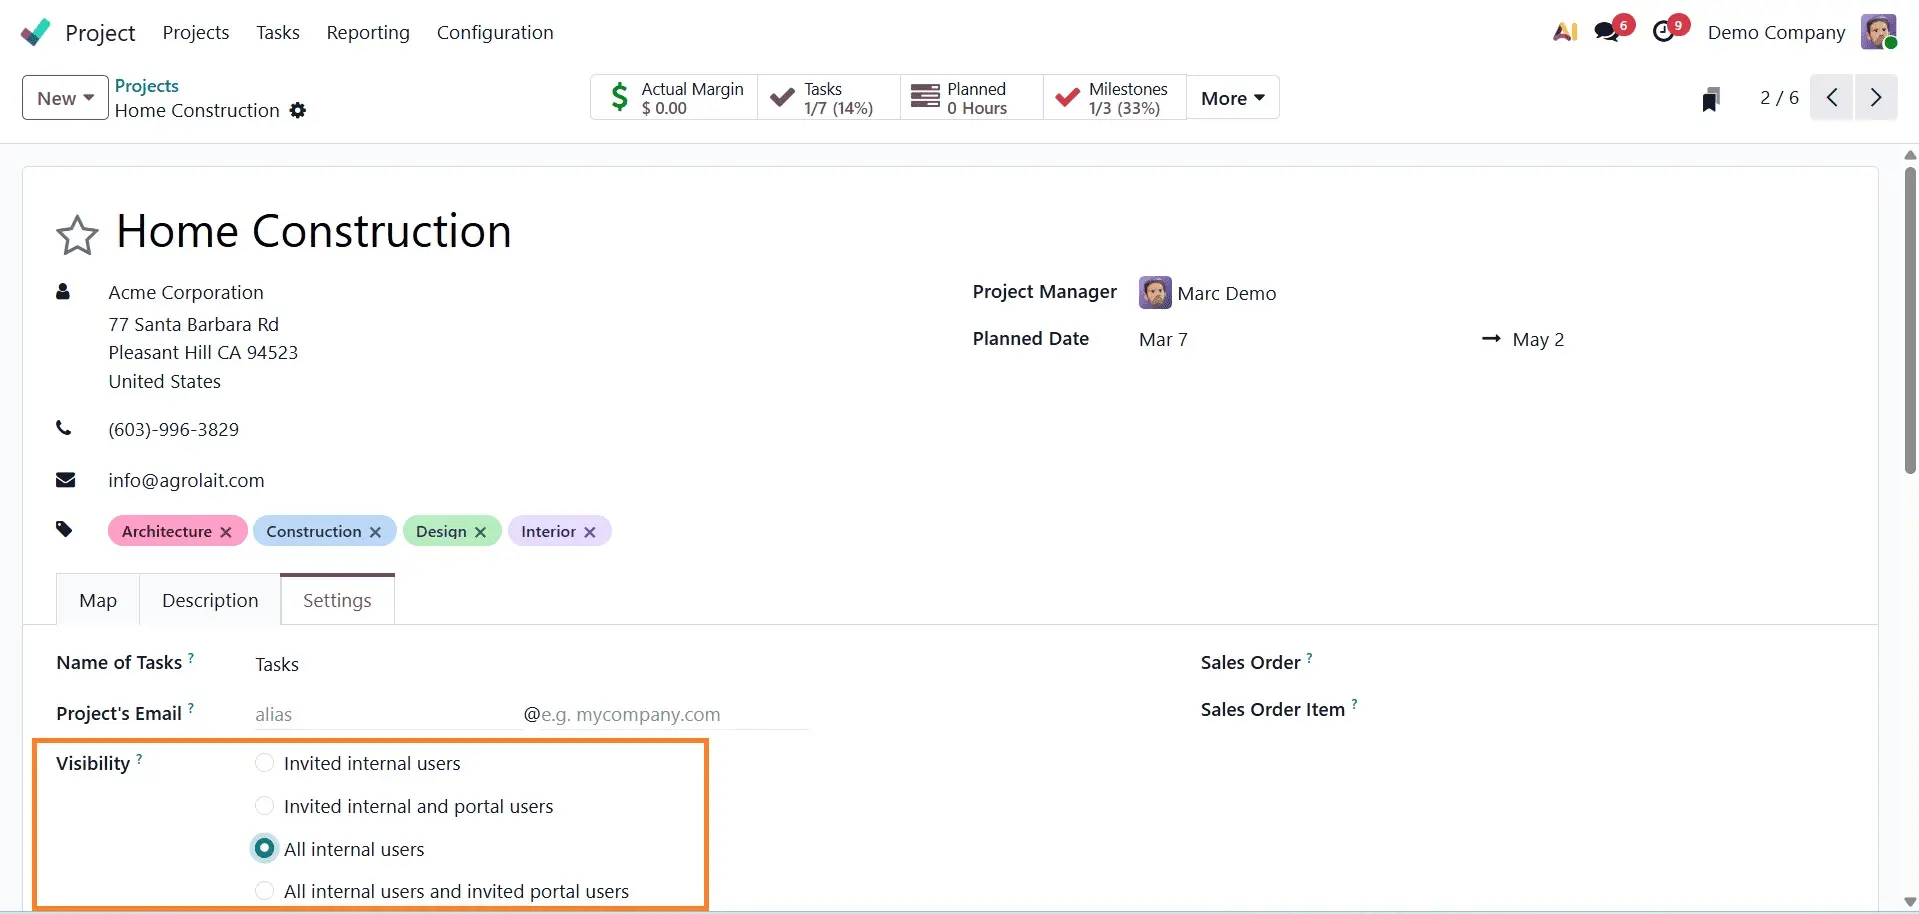
When the project visibility is set to “All Internal Users”, every employee within the company will have access to the project. This ensures full transparency and allows all internal teams to view and collaborate on the project as needed.
The next option is “Invited Portal Users and All Internal Users.” When this visibility setting is enabled, the project becomes accessible to all internal employees as well as selected portal users who have been granted access. This option is ideal for collaboration with external stakeholders such as clients or partners.
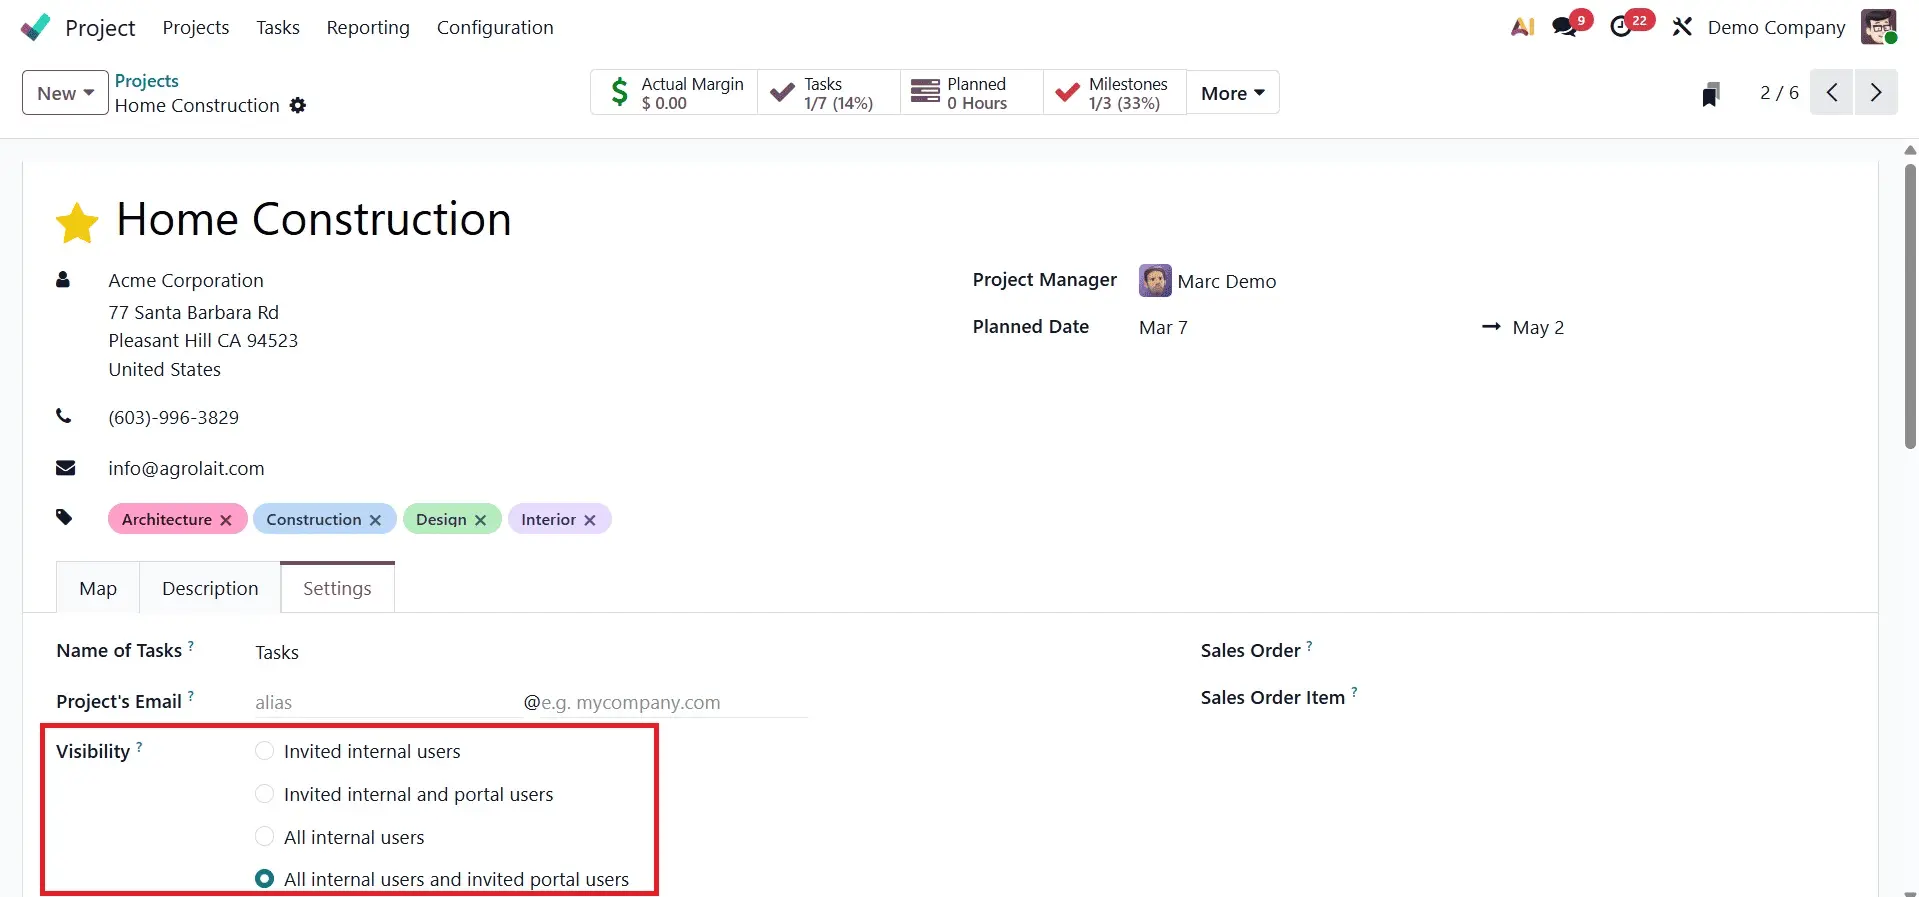
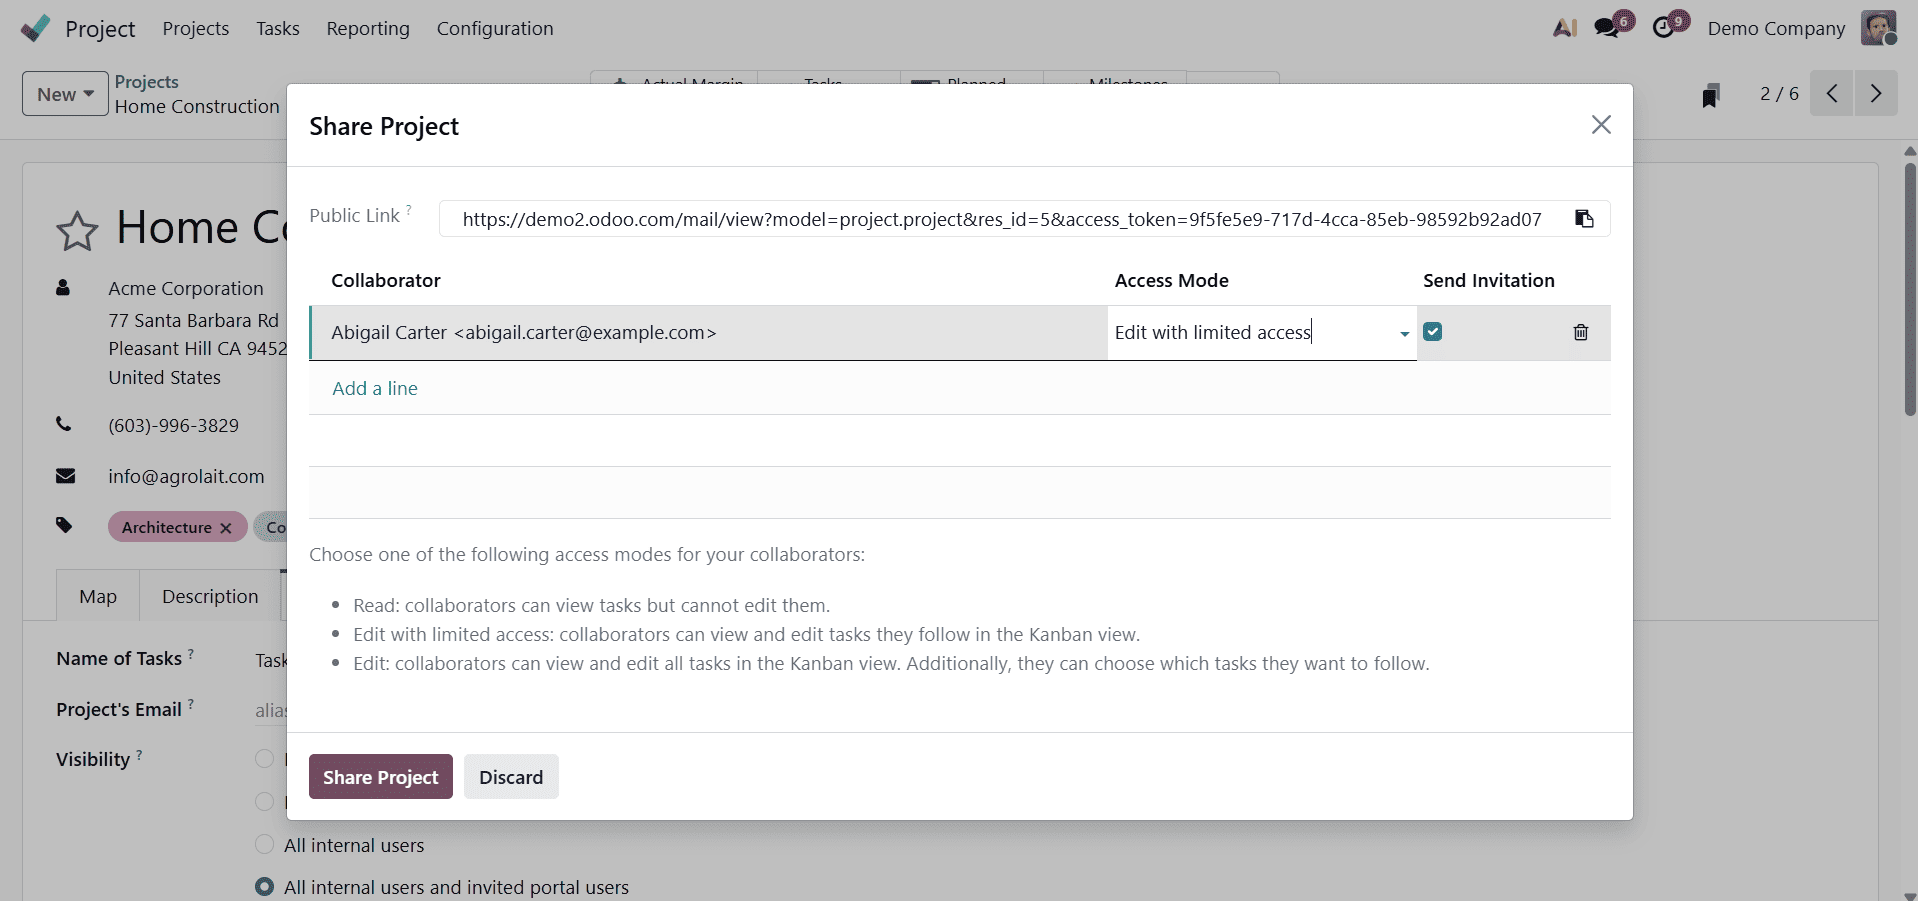
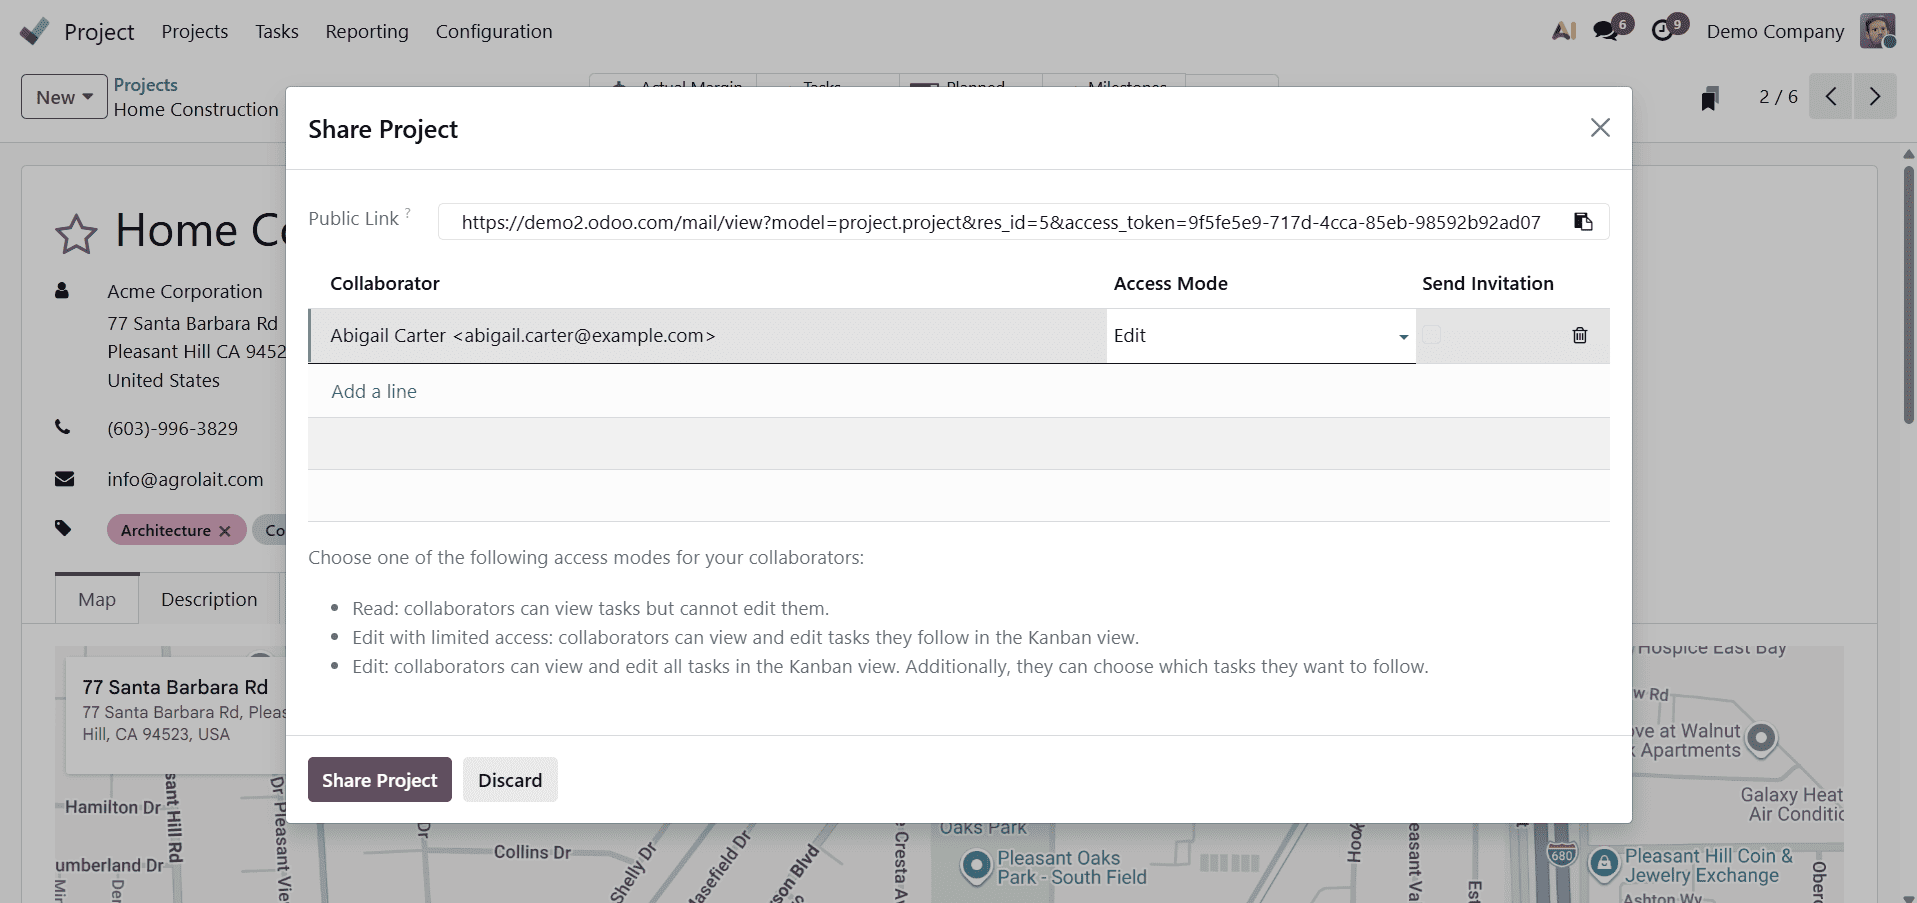
When the visibility is set to “Invited Portal Users and All Internal Users”, a Share Project button appears at the top of the project. This option allows you to share the project with external collaborators by inviting portal users and defining their access mode.
The available access modes include:
- Read: Collaborators can only view tasks but cannot edit or create new ones.
- Edit with Limited Access: Collaborators can view and modify only the tasks they follow. If a portal user is added as a follower of the project but not specific tasks, they will need to be added as a follower of each task to access it. The project or task customer is automatically added as a follower.
- Edit: Collaborators can view and modify all tasks in the Kanban view and choose which tasks to follow.
In this example, “Joel Willis”, a portal user, has been added as a collaborator with Read access. To complete the process, check the box to send the invitation.
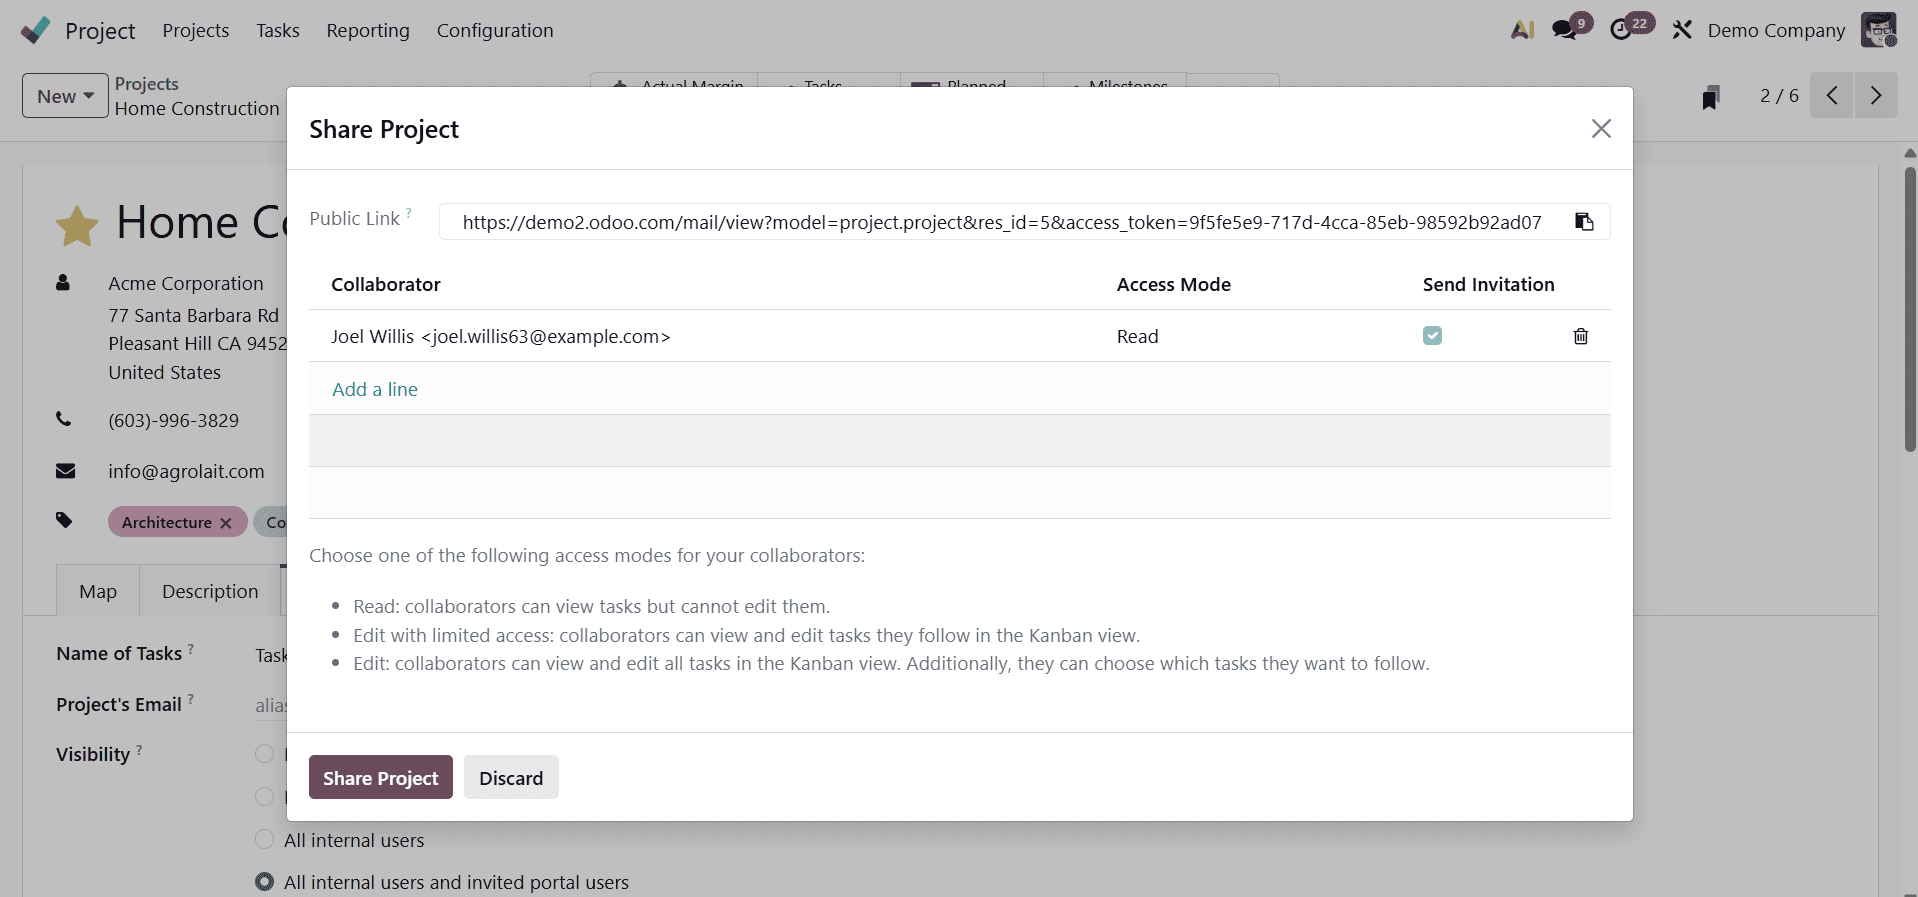
Additionally, the project can be made publicly accessible, allowing anyone to view it in read-only mode.
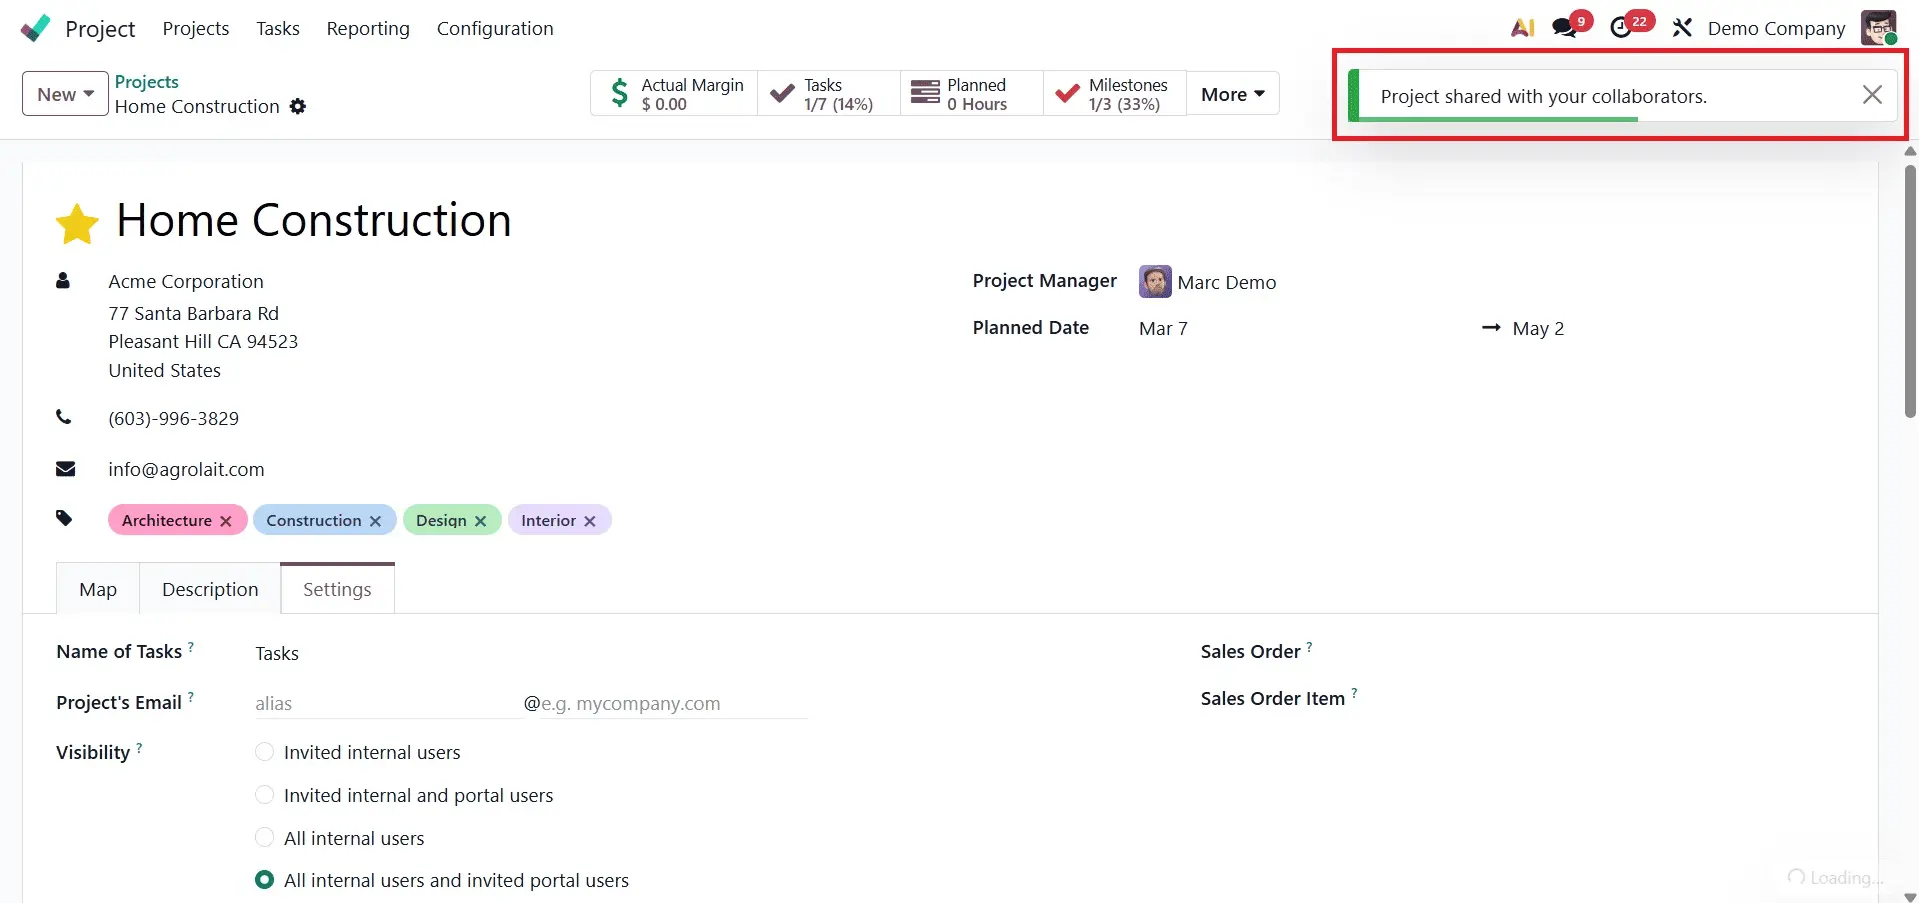
After adding collaborators and clicking the Share Project button, a confirmation message stating “Project shared with your collaborators” will appear, indicating that the sharing settings have been successfully applied.
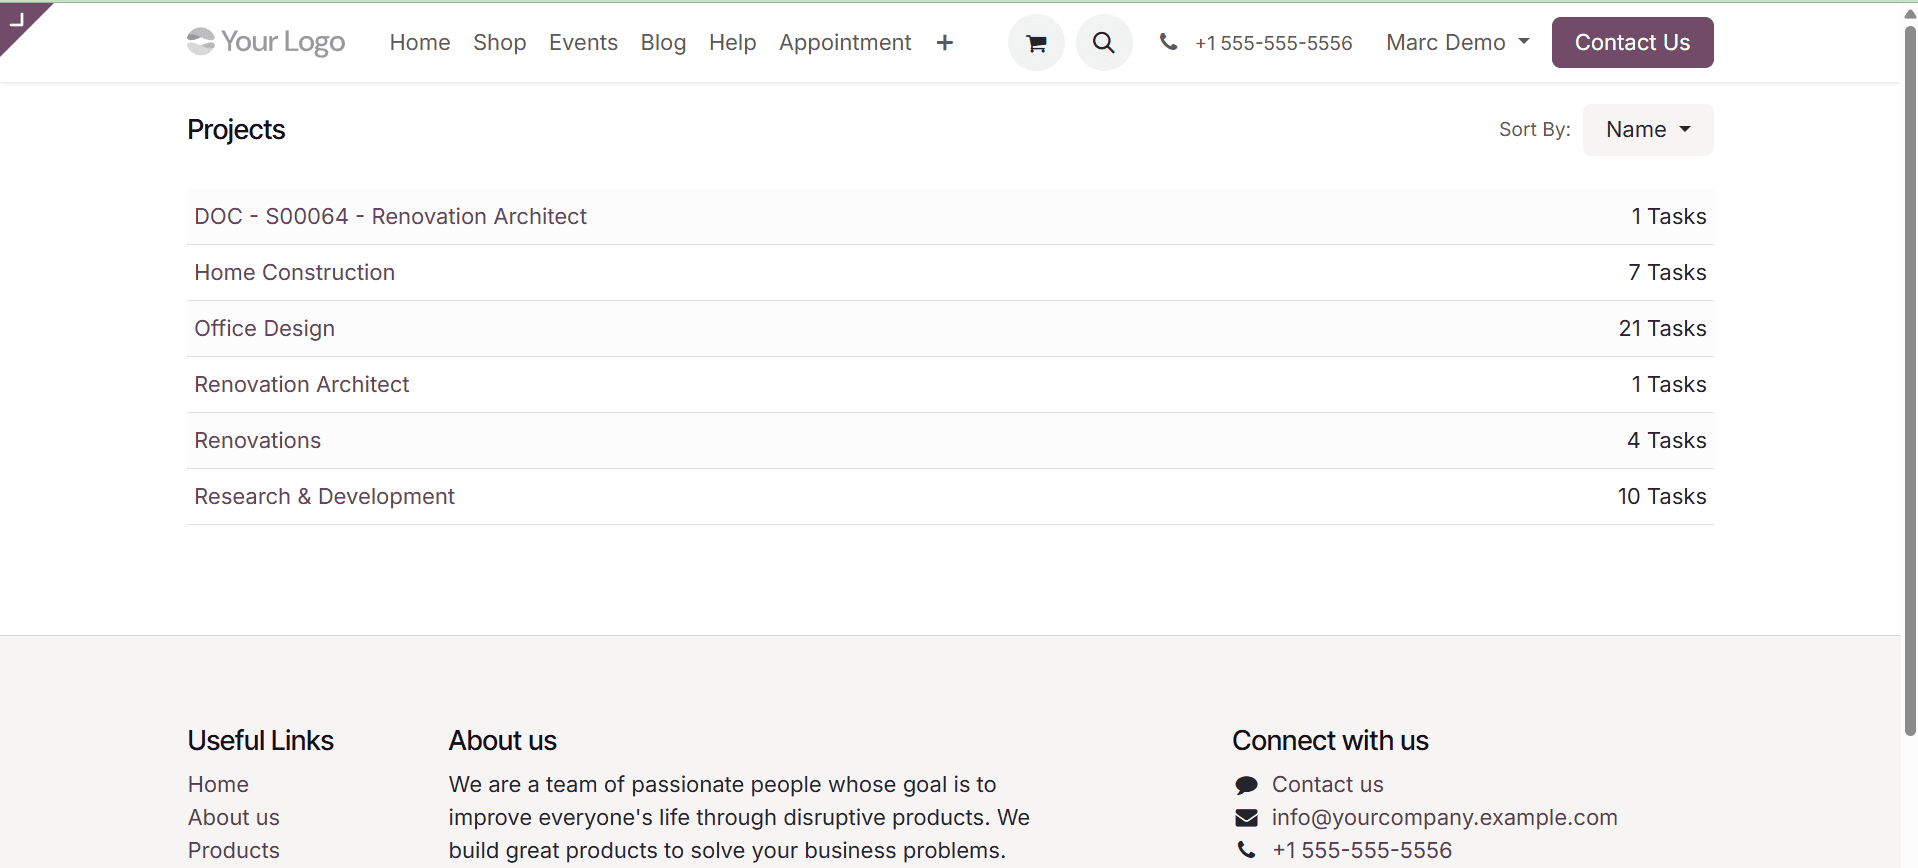
Go to Projects from their portal after logging in as "Marc Demo." Choose the "Home Construction" project from the list of projects.
The portal user will only be able to view the tasks because the access is set to Read; they will not be able to edit or add new tasks.
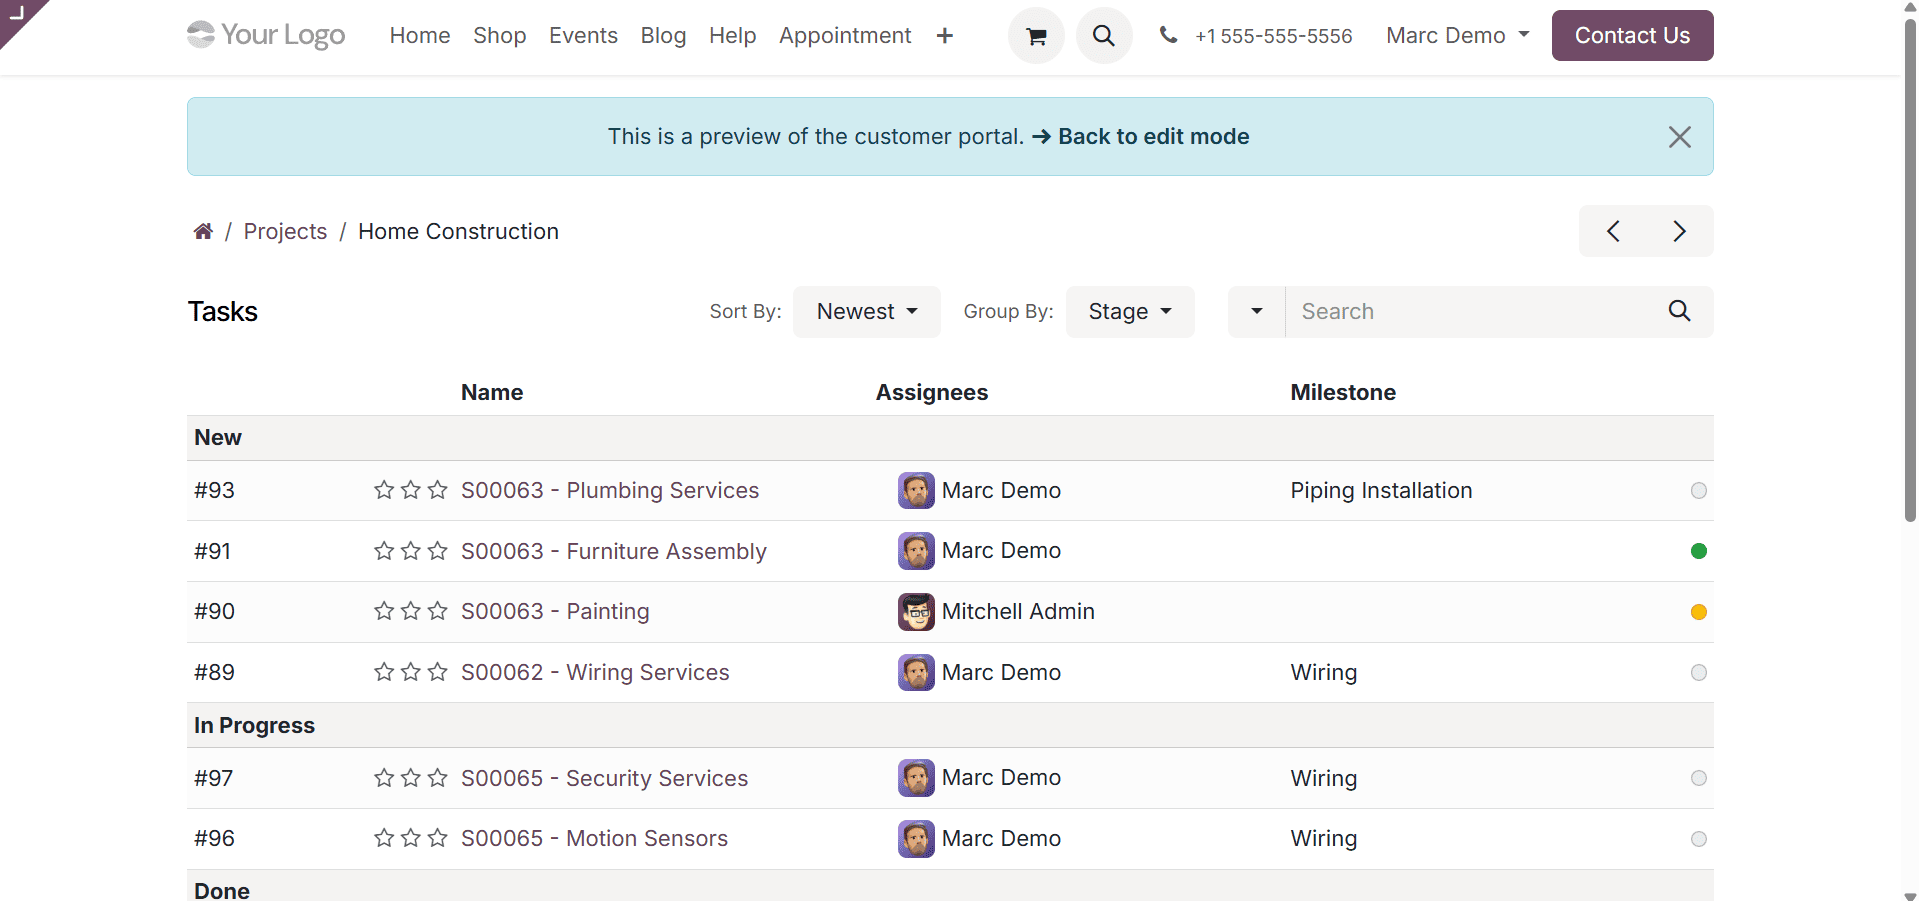
Only the Task Name, Assignees, and Time Spent on the Task will be shown to the collaborators. From the detailed view, they can see other information like the Customer, Allocated Time, Project Progress, etc.
Select "Edit with limited access" from the admin's portal.
When the Access Mode is set to Edit with Limited Access, collaborators can only view and modify the tasks they are following.
In this example, the portal user “Marc Demo” has been assigned as a follower of only one task out of seven under the project “Home Construction.”
As a result, he will only be able to view and edit that specific task. However, he will still have the ability to create new tasks within the project.
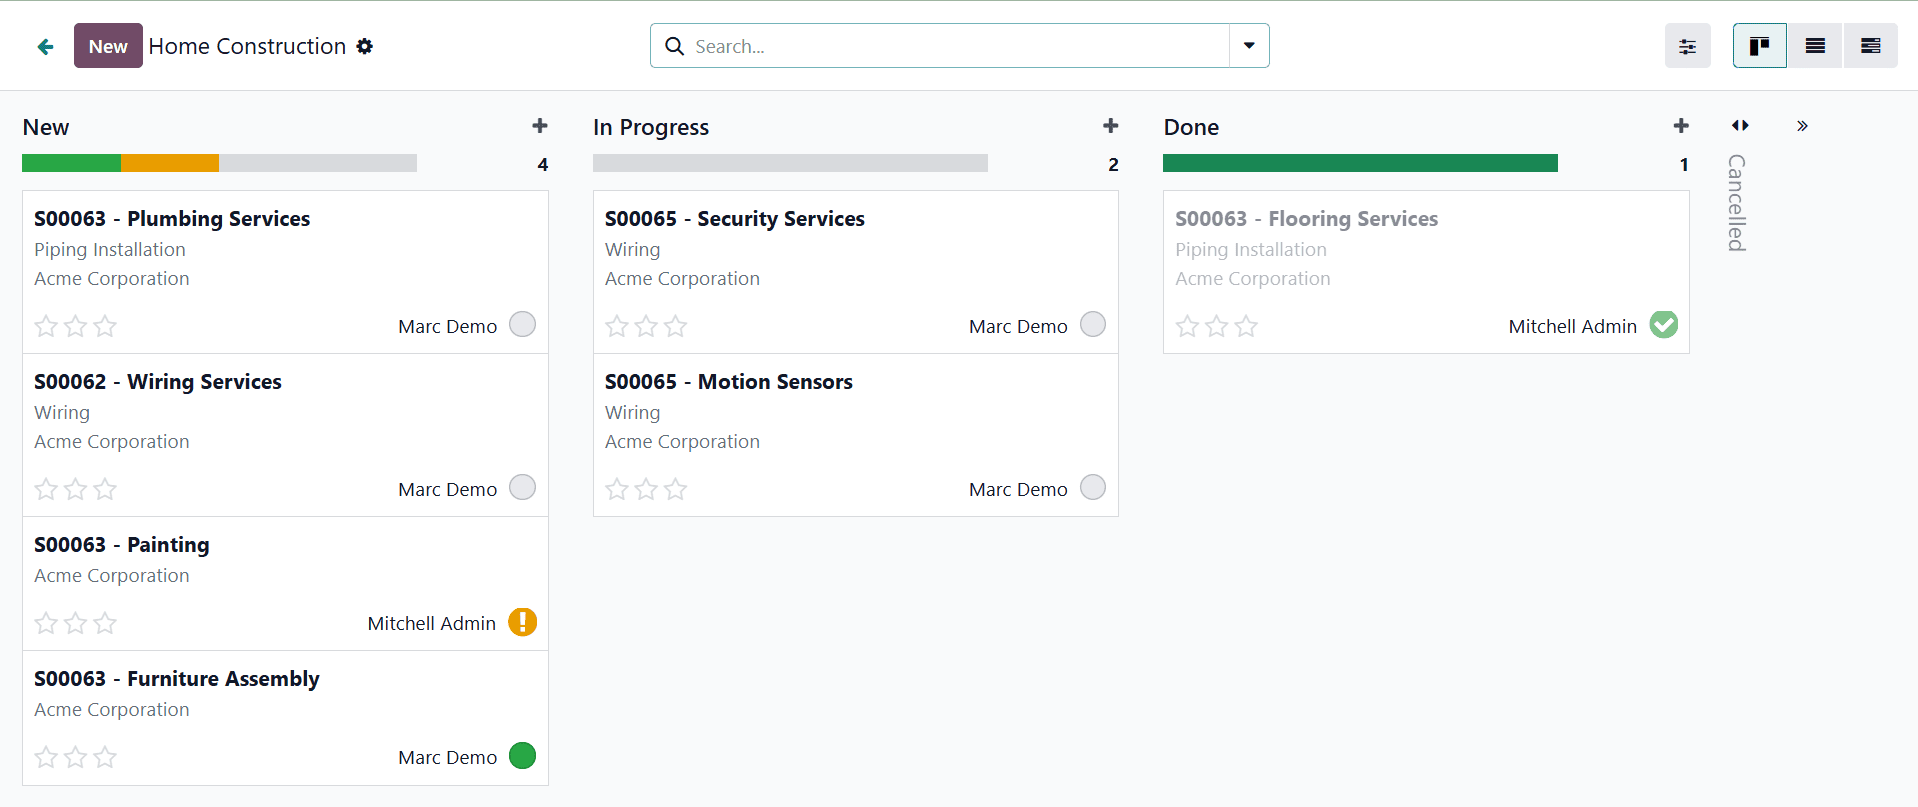
Additionally, all tasks can be viewed and managed in the Kanban view, providing a clear and organized overview of project progress.
To enable the portal user to modify and view every task in the project, not just the ones they are following, set the Access Mode to Edit.
All of the tasks and subtasks within that project can be seen and edited by the user from their portal.
Thus, this is how project visibility is configured in Odoo 19. By setting the appropriate visibility levels, businesses can ensure that project information is accessible only to the relevant stakeholders while maintaining confidentiality where required—whether it is limited to specific internal users, all internal users, or invited portal users.
Choosing the right visibility option enhances productivity, improves project management, and encourages effective collaboration. With these flexible settings in Odoo 19, organizations can optimize workflows, increase transparency, and ensure smooth project execution.